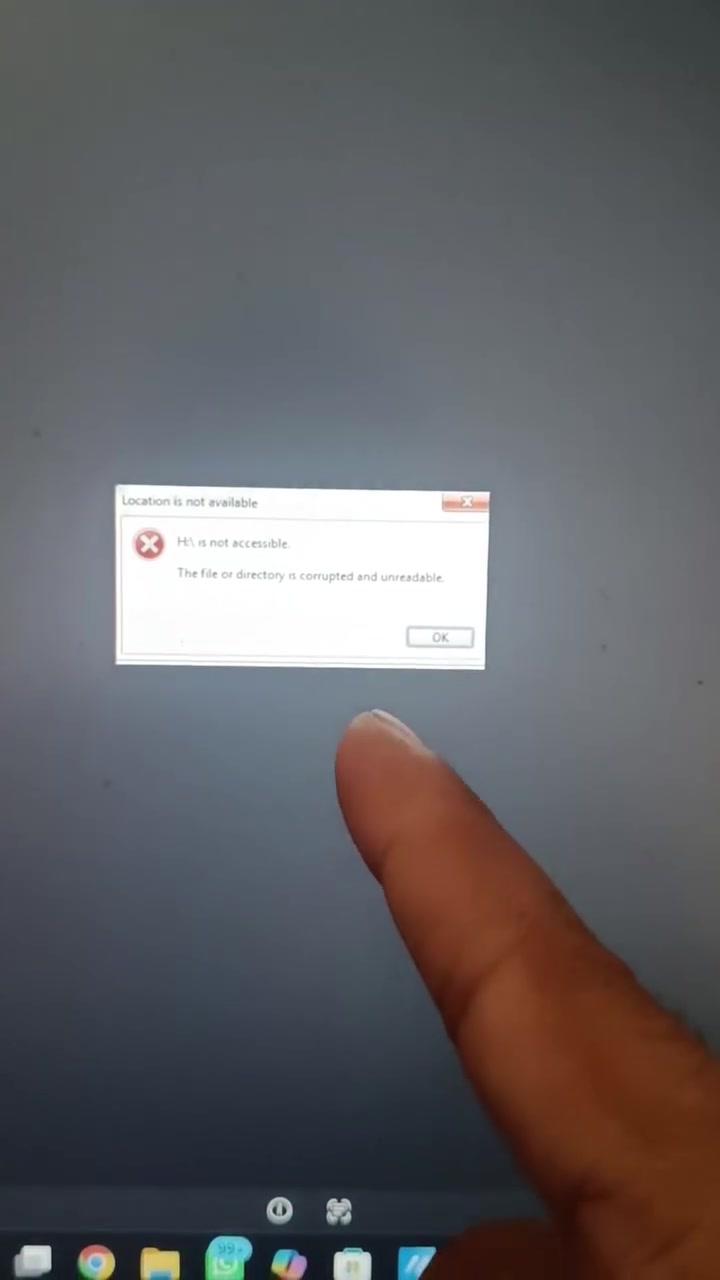
Windows slowdowns, crashes, and errors can be infuriating. Fortunately, there's a built-in Windows command that could fix these — the DISM tool. Appearing as Microsoft’s troubleshooter, DISM (Deployment Imaging Service and Management Tool) repairs and restores the Windows image when the system files are corrupted. It runs from an elevated Command Prompt or Windows PowerShell.
System Files on the Mend
So what makes DISM so powerful? It checks the Windows Component Store for corruption and replaces corrupted files with a cached copy stored in the Component Store and online Windows Update files if needed. This operation requires administrative privileges and runs swiftly once initiated. Just type DISM.exe /Online /Cleanup-Image /RestoreHealth in your elevated Command Prompt or PowerShell, and let the process complete. Be warned: other System File Checker operations are not so swift.
These two commands together (DISM.exe /Online /Cleanup-Image /RestoreHealth and sfc /scannow) are the go-to process for repairing corrupted system files. Though DISM is a Windows 8 and later technology, sfc began earlier. System File Checker (SFC) has been a standard Windows system tool since Windows XP System File Checker. It's a command-line tool that scans for and repairs corrupted files, checking them against those stored in the Component Store and Windows Update, and replacing them when necessary.
Even the best-maintained systems can develop errors. As systems age, they accrue changes from downloaded updates, installed software, and even user interventions. Reinstallation ensures a smooth user experience.
Regaining System Integrity
With Windows 10, Microsoft introduced two powerful built-in utilities to help users recover their operating system: System File Checker (SFC) and the Deployment Image Servicing and Management tool (DISM). These tools help repair corrupted system files. It's a proactive approach to maintaining and troubleshooting Windows systems — they can identify the exact corruption and fix it. Files stored in the Windows Component Store, which acts as a repository for storing Windows system files, can be used to repair files that have become corrupted over time.
The visual summary shows the commands sfc /scannow and DISM.exe /Online /Cleanup-Image /RestoreHealth being executed on a computer screen. The error: "The file or directory is corrupted and unreadable" indicates that both commands might be necessary. First execute DISM before sfc. Running sfc scans to find and fix corruption; DISM checks against the ‘base source’ for errors. Unlike the Windows System File Checker, the software doesn't immediately identify changes to files directly.
The System File Checker ( sfc ) is a command-line utility that scans for and restores corrupted system files in Windows. When a system file is damaged or corrupted, it can cause various issues, including system slowdowns, crashes, and errors. The sfc command can be used to scan for and repair these corrupted files, helping to stabilize the system and improve its performance.
The Terminal Interface
To begin the DISM command process, you must open the terminal. This can be done by pressing the keys Windows, then pressing the X key and selecting A to open the Windows Terminal, or by pressing the Windows key and typing CMD to find the Command Prompt or Windows Terminal. Running these commands requires administrative privileges. Doing so ensures it can access and modify the necessary system files and services. If you skip this step, the process will fail. Running sfc:
- Open a Command Prompt or Windows PowerShell: In the Start menu, find and open Command Prompt or Windows PowerShell. Right-click and select "Run as administrator."sfc scans and options are more valuable options in the administrator Command Prompt.
- Run the Command:
Type
sfc /scannowand press Enter. The system will scan all protected system files, and replaces those it deems corrupted. - Wait for Completion: Don’t close the Command Prompt or Windows PowerShell; let sfc /scannow finish.
- Check the Output: Once completed, read the output. A message like "Windows Resource Protection did not find any integrity violations" indicates all is well. Any issues will be noted, and the tool will try to fix them.
Repairing the Windows Image
Once DISM is properly invoked the software finds and cures corruption from a saved up-to-date copy (stored online) or a local copy if one exists. Microsoft’s own documentation specifies to run DISM before sfc scan—in case any system files have been damaged.
But what if DISM errors out? Users who experience errors related to file corruption can use this tool to restore the system image. If running DISM.exe /Online /Cleanup-Image /RestoreHealth fails due to file corruption or other errors, there are alternative methods to restore the system image. These include using a Windows ISO file or a recovery drive. These tools use files stored in the Windows Update location — which acts as a repository for storing Windows system files— to repair corrupted Windows components.
Running DISM:
- Open Command Prompt or Windows PowerShell as Administrator: A targeted ‘Run as Administrator’ invite.
- Run DISM:
Type:
DISM.exe /Online /Cleanup-Image /RestoreHealth— and start. - Wait: The scan can take a while; leave it to finish.
- Check the Output: Look for a message that says "The operation completed successfully."
Command Sequence
When DISM is launched the command reads files stored in the Component Store, which acts as a repository for storing Windows system files. This process ensures a complete and accurate review of the system components. This also makes a sure as sfc /scannow command accurate and precise—the application reads what exists in the Component Store, which acts as a repository and checks for corruption in the Component Store.
Solving system corruption starts with a single precautionary step: run DISM. The interdependent nature of your system files necessitates DISM first, then sfc. The DISM.exe /Online /Cleanup-Image /RestoreHealth command directs DISM to check Component Store for corruption and repair them.
Other System Repair Methods
Before running a repair command, users can try various approaches. One such approach may be disabling startup programs and services that could interfere with the repair process. You might also use safe mode to prevent third-party software from disrupting repairs. You might also try a Windows refresh or reset in case the scan comes back with errors. Memory problems can also cause system instability. A memory diagnostic test can diagnose memory errors. If the problem persists, consider these steps:
- Run a Full System Scan: A thorough scan can identify malware or other issues.
- Update Drivers: Outdated drivers might cause system instability.
- Check for Hardware Issues: Sometimes, hardware problems can cause system errors.
- Create a System Restore Point: Before making any changes, create a restore point.
- Reinstall Windows: If all else fails, a clean installation might be necessary.
The User's Next Steps
DISM and sfc/ scan commands are very robust built-in tools that users can easily wield to keep their Windows systems in good health. When a user encounters a system error, simply open Command Prompt and run the command. If the problem persists, consider alternative methods such as a System Refresh or Reset.
- Backup important data: Before running a repair, it's essential to back up important data to avoid any potential loss.
- Create a System Restore Point: This step should come before a repair. You can access this tool manually under system maintenance, or from Windows Start > Accessories > System Tools > System Restore.
- Run the repair commands:
- Open Command Prompt with administrative privileges and use
DISM.exe /Online /Cleanup-Image /RestoreHealth - Then use
sfc /scannowafter completing the DISM scan.
- Open Command Prompt with administrative privileges and use
- Follow the instructions: After initiating DISM and sfc, let the commands complete.
Safeguarding System Integrity
System File Checker and DISM are indispensable built-in tools to maintain the overall health and integrity of the operating system. These tools play a crucial role in identifying and resolving system errors. The integrated tools effectively repair corrupted Windows files and components stored in the Windows Component Store. The next time your Windows PC slows down, crashes, or displays random errors, put these built-in repair commands to good use.
Watch the Reel
Questions readers ask
What exactly is the DISM tool and how does it work?
The DISM (Deployment Imaging Service and Management Tool) is a command-line utility in Windows that helps repair and restore the Windows image when system files are corrupted. It works by checking the Windows Component Store for corruption and replacing corrupted files with cached copies or online Windows Update files. It requires administrative privileges to run.
How do I run the DISM tool on my Windows PC?
To run the DISM tool, you need to open an elevated Command Prompt or Windows PowerShell. Type the command `DISM.exe /Online /Cleanup-Image /RestoreHealth` and let the process complete. This command checks for and repairs corrupted system files.
Is the DISM tool available on all versions of Windows?
The DISM tool is available on Windows 8 and later versions. However, System File Checker (SFC), which is a similar tool, has been available since Windows XP and can also be used to repair corrupted system files.
How does the DISM tool differ from the System File Checker (SFC)?
Both DISM and SFC are used to repair corrupted system files, but they work slightly differently. DISM checks against the Windows Component Store and online Windows Update files, while SFC scans for and repairs corrupted files by comparing them against a cached copy in the Component Store. It's common to run DISM first, then SFC for a comprehensive repair.
Can I use the DISM tool to fix issues caused by malware?
The DISM tool is primarily designed to repair corrupted system files, not to remove malware. While it might help stabilize the system if malware has corrupted files, it's not a substitute for dedicated antivirus or anti-malware software. Always use security tools to remove malware first.
What should I do if the DISM tool doesn't fix my system issues?
If the DISM tool doesn't resolve your system issues, you might need to try running the System File Checker (SFC) as well. If both tools fail, consider performing a system restore to a previous point or, as a last resort, reinstalling Windows. Always back up your important data before taking such steps.
Do I need to run DISM and SFC together every time I encounter a system issue?
Not necessarily. You can start with the DISM command to check for and repair corruption. If issues persist, then run the SFC command. Running both commands together isn't always needed, but it can be a thorough approach to ensure all corrupted files are addressed.
Related deep dives
Similar reads based on topic and creator.

Recent articles
Fresh deep dives from the latest Reels we unpacked.




Comments
Be the first to comment.