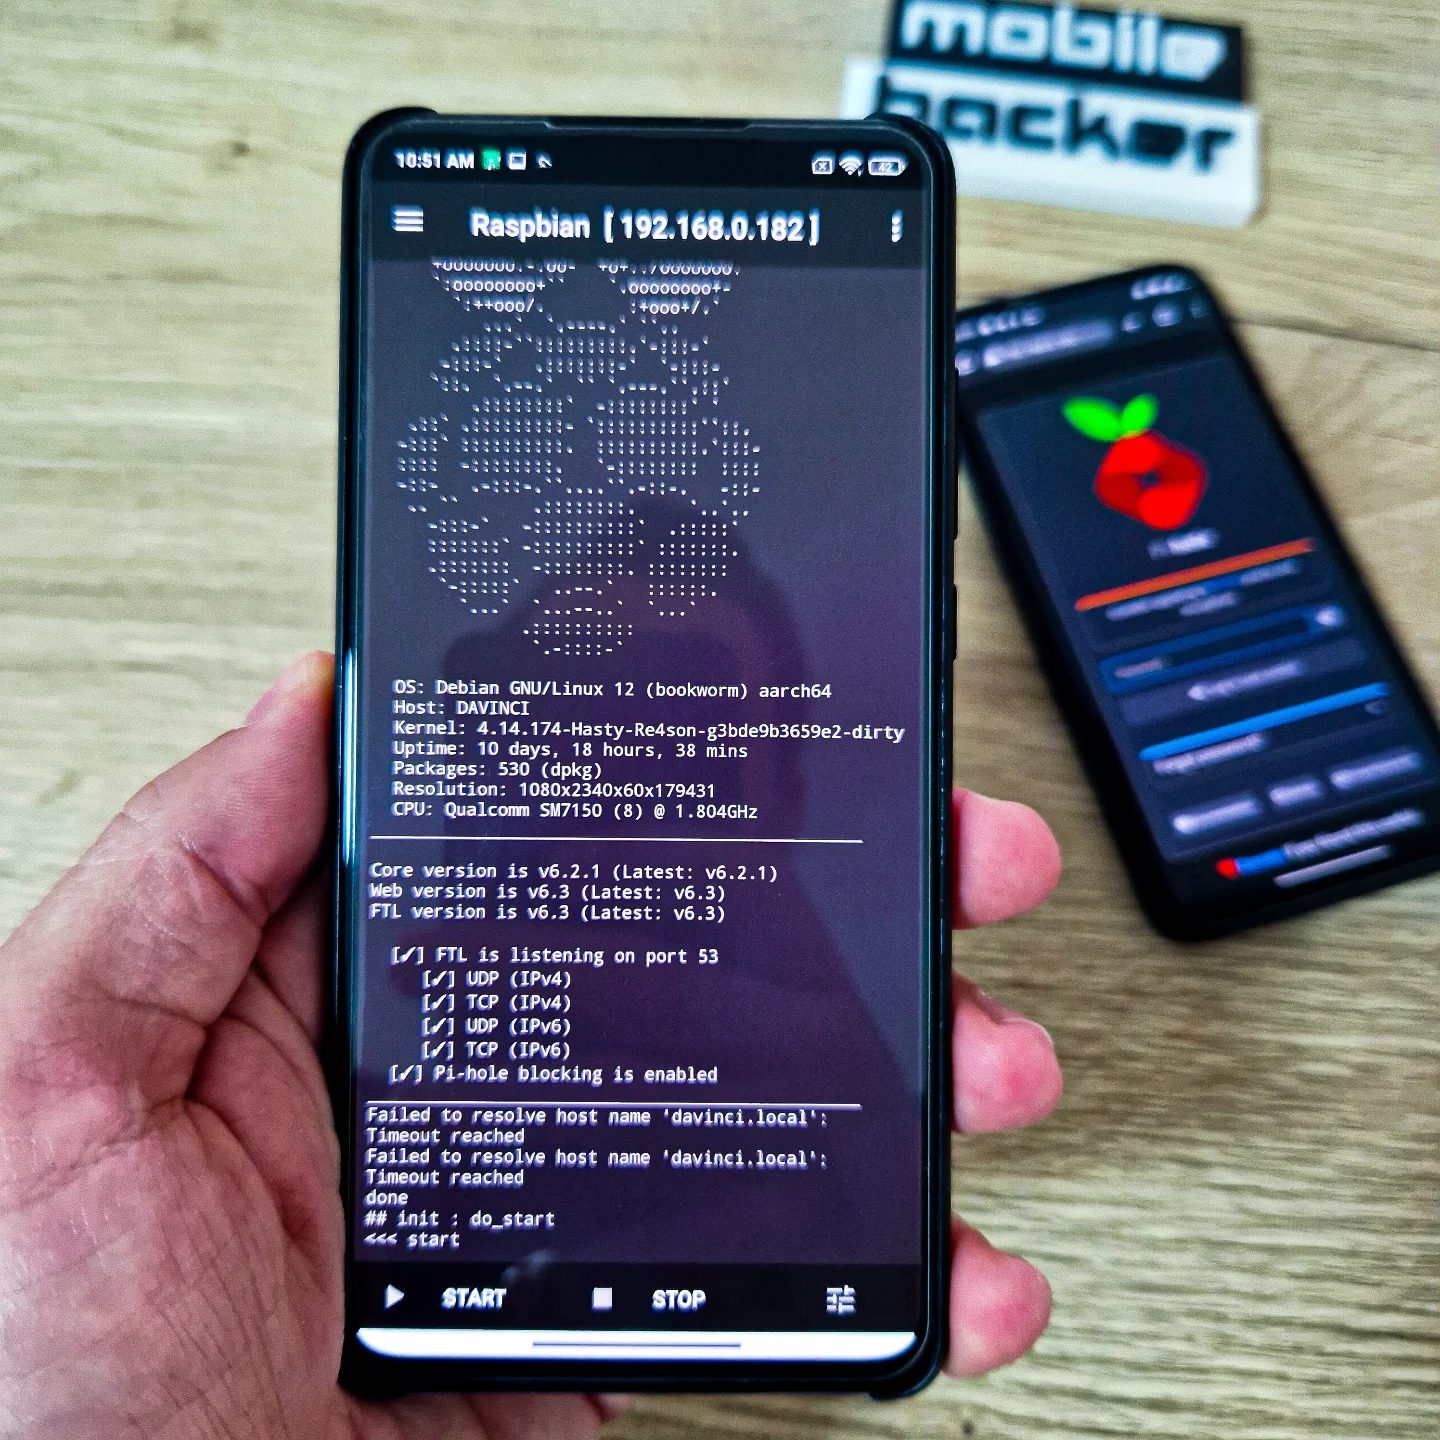
Portable Pi-hole: Using Raspberry Pi to Block Ads and Trackers
Transforming an old Android device into a portable Pi-hole for blocking ads and trackers is a clever way to enhance online privacy and browsing experience. Pi-hole is a network-wide ad blocker that can be configured on various devices, including a Raspberry Pi. This guide will walk you through the process, providing context, practical tips, and important takeaways.
Why This Matters
In today's digital age, online privacy and security are paramount. Advertisements and trackers can slow down your internet connection, invade your privacy, and even compromise your device's security. By setting up a portable Pi-hole, you can block these intrusive elements, ensuring a faster and safer browsing experience. This setup is particularly useful for those who travel frequently or need to maintain a secure network on the go.
Main Discussion
What is Pi-hole?
Pi-hole is an open-source software that acts as a network-wide ad blocker. It works by intercepting and blocking network requests to known ad and tracker servers, preventing them from loading on your device. Initially designed for the Raspberry Pi, Pi-hole can be installed on various other devices, including rooted Android devices, making it a versatile tool for enhancing online privacy.
Setting Up Pi-hole on Raspberry Pi
To set up Pi-hole on a Raspberry Pi, you'll need a few components:
- A Raspberry Pi (any model)
- A microSD card with Raspbian installed
- A power supply for the Raspberry Pi
- An Ethernet cable or Wi-Fi dongle for network connectivity
Follow these steps to install and configure Pi-hole:
- Install Raspbian: If you haven't already, install Raspbian on your microSD card and boot up your Raspberry Pi. Raspbian is the official operating system for Raspberry Pi and is based on Debian GNU/Linux.
- Update and Upgrade: Open a terminal window and update your package list with the command
sudo apt updatefollowed bysudo apt upgradeto ensure all your software packages are up-to-date. - Install Pi-hole: Run the following command in the terminal to install Pi-hole:
curl -sSL https://install.pi-hole.net | bash.
During the installation process, you'll be prompted to configure various settings, including your network interface, DNS settings, and Pi-hole password. Follow the on-screen instructions to complete the setup.
Configuring Pi-hole
Once Pi-hole is installed, you can access the web interface by navigating to the IP address of your Raspberry Pi in a web browser. The default login credentials are usually pi-hole for the username and the password you set during installation.
In the web interface, you can:
- Enable/Disable Pi-hole: Toggle Pi-hole on and off as needed.
- View Blocked Ads: See a list of ads and trackers that have been blocked.
- Configure Whitelists: Add specific domains to the whitelist if you want to allow ads from certain sites.
- Update Lists: Update the list of ad and tracker domains to ensure Pi-hole is using the latest information.
Using Pi-hole on a Rooted Android Device
For those who prefer a more portable solution, installing Pi-hole on a rooted Android device is an excellent alternative. To do this, you will need:
- A rooted Android device
- Termux, a terminal emulator for Android
- A network connection (Wi-Fi or mobile data)
Follow these steps to install Pi-hole on a rooted Android device:
-
Install Termux: Download and install Termux from the Google Play Store or an alternative app store.
-
Update Termux Packages: Open Termux and update the package list with the command
pkg updatefollowed bypkg upgrade. -
Install Dependencies: Install the necessary dependencies by running:
pkg install curl pkg install wget pkg install openssh pkg install proot pkg install root-essential pkg install bash pkg install git -
Install Pi-hole: Run the Pi-hole installation script:
curl -sSL https://install.pi-hole.net | bash -
Configure Pi-hole: Follow the on-screen instructions to configure Pi-hole on your Android device. Ensure you set a static IP address for your device to make it easier to access the Pi-hole web interface.
Advanced Configuration
After setting up Pi-hole, you can explore advanced configurations to enhance its functionality. For example, you can use Pi-hole as a DNS server for your entire network, blocking ads and trackers for all connected devices. Additionally, you can configure Pi-hole to use secure DNS protocols like DNS over HTTPS (DoH) or DNS over TLS (DoT) to encrypt your DNS queries and protect your privacy.
Practical Tips
- Regular Updates: Keep your Pi-hole software and blocklists up-to-date to ensure maximum effectiveness.
- Optimize Performance: If you notice a slowdown, consider optimizing your Pi-hole settings or upgrading your device's hardware.
- Network Configuration: Ensure your network is correctly configured to route DNS queries through Pi-hole. This may involve setting your router's DNS settings to point to your Pi-hole device or configuring each device individually.
- Secure Your Installation: Use a strong password for the Pi-hole web interface and consider enabling HTTPS for added security.
Important Takeaways
- Pi-hole is a versatile tool that can be installed on various devices, including Raspberry Pi and rooted Android devices.
- Enhanced Privacy and Security: By blocking ads and trackers, Pi-hole helps protect your online privacy and improves your browsing experience.
- Portability: Setting up Pi-hole on a portable device like a rooted Android allows you to take your ad-blocking capabilities with you wherever you go.
- Customization: Pi-hole offers a range of customization options, allowing you to tailor the ad-blocking experience to your specific needs.
Conclusion
Setting up a portable Pi-hole on a Raspberry Pi or rooted Android device is a practical way to enhance your online privacy and browsing experience. By blocking ads and trackers, you can enjoy faster load times, improved security, and a cleaner browsing experience. Whether you're at home or on the go, a portable Pi-hole ensures that your online activities are protected and optimized.
Watch the Reel
Questions readers ask
Can any old Android device be used for a portable Pi-hole setup?
Most old Android devices can be used, but they should run a recent version of Android with root access, as this setup requires custom configurations. Ensure the device has a decent amount of storage and processing power, as well as a reliable power source.
What is the benefit of using a Raspberry Pi with Pi-hole for blocking ads and trackers?
A Raspberry Pi, when combined with Pi-hole, offers a lightweight and low-power solution. It can be easily set up to protect all devices on your network, not just your Android device. This makes it an ideal choice for travelers who need a secure and private network on the go.
Can I use a mobile hotspot with my portable Pi-hole setup?
Yes, you can use a mobile hotspot in conjunction with your portable Pi-hole setup. This allows you to take advantage of the ad-blocking and tracking protection provided by Pi-hole, even when using a mobile data connection. Simply connect your Android device and other devices to the mobile hotspot and configure them to use the Pi-hole as a DNS server.
How can I ensure my Pi-hole setup is secure for mobile use?
It is essential to secure your Pi-hole setup by using strong, unique passwords. Additionally, consider using a firewall to restrict access to the Pi-hole admin interface and disable remote access when not in use. Always keep your software up-to-date to protect against potential vulnerabilities.
Will using a Pi-hole for blocking ads and trackers improve my internet speed?
Yes, using a Pi-hole can improve your internet speed by reducing the number of requests to advertisement and tracker servers. This can lead to faster page load times and a more fluid browsing experience. Additionally, Pi-hole can help prevent bandwidth clutter caused by unwanted ads and trackers, further enhancing performance.
Is it possible to configure a Pi-hole setup to block specific domains or websites?
Yes, you can configure your Pi-hole setup to block specific domains or websites by adding them to the blacklist. This can be done through the Pi-hole admin interface, which allows you to customize your ad-blocking and tracking protection to suit your needs. For example, you can block social media sites to reduce distractions or block specific domains that you do not trust.
Can I use my portable Pi-hole setup to protect multiple devices simultaneously?
Absolutely. One of the key advantages of a Pi-hole setup is its ability to protect all devices on your network. By configuring your Android device to act as a DNS server, all connected devices can benefit from the ad and tracker blocking capabilities, making it an excellent solution for families or groups traveling together.
Related deep dives
Similar reads based on topic and creator.




Recent articles
Fresh deep dives from the latest Reels we unpacked.




Comments
Be the first to comment.