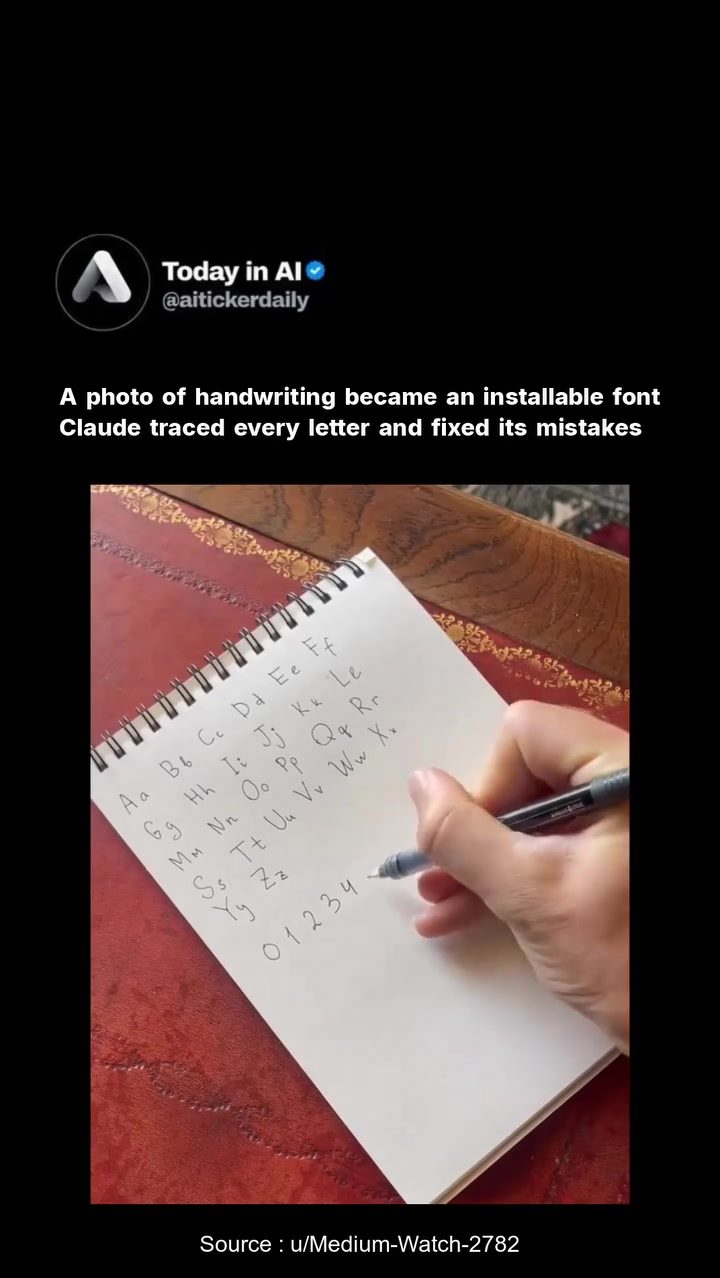
Creating a Custom Font from Handwriting
Converting handwriting into a digital font is a fascinating process that blends art and technology. This journey begins with a simple notebook entry, where someone writes out their alphabet and numbers. The next step involves photographing this handwritten page and using specialized software to convert it into a digital, installable font.
The process involves several key steps, starting with tracing the handwritten letters into vector shapes. This is typically done using a font editor, which allows for precise adjustments and corrections. The tracing process transforms the handwritten letters into digital outlines that can be manipulated and refined.
One of the key challenges in this process is distinguishing between similar letters, such as uppercase and lowercase 'S'. This is where artificial intelligence (AI) comes into play. AI can analyze the context and size of the letters to make accurate distinctions. Additionally, AI can identify and remove unwanted elements, such as shadows and binding holes, which are often present in handwritten text.
The process doesn't stop at tracing and fixing mistakes. AI also reviews its own rendered preview to ensure the font meets the desired quality. This iterative process helps to flag any letters that were not traced accurately, allowing for further refinements.
Once the font is refined, it can be saved as a TrueType Font (TTF) file. This file format is widely supported and can be installed on various devices, making your custom font accessible for use in different applications. The result is a fully local, MIT-licensed font that was built from a single messy photo.
Why This Matters
Creating a custom font from handwriting opens up a world of creative possibilities. Whether you're a designer looking to add a personal touch to your projects or an enthusiast wanting to capture a unique style, this process allows you to turn your handwriting into a versatile digital tool. The ability to create a custom font from a simple photograph is a testament to the advancements in AI and design software.
The Process of Creating a Custom Font
Capturing the Handwriting
The first step in creating a custom font is to write out your alphabet and numbers in a notebook. This can be done in any style or script you prefer, as long as it is legible. The next step is to photograph the handwritten page. Ensure the photo is clear and well-lit, as this will make the tracing process smoother.
Using a Font Editor
After capturing the handwriting, you can use a font editor to begin the conversion process. This software allows you to trace the handwritten letters into vector shapes. The tracing process is crucial, as it converts the handwritten letters into digital outlines that can be manipulated and refined.
Refining the Font
Once the letters are traced, the next step is to refine the font. This involves fixing any mistakes that were made during the tracing process. AI plays a significant role in this step, as it can distinguish between similar letters, such as uppercase and lowercase 'S', and remove unwanted elements, such as shadows and binding holes.
Reviewing the Preview
After the initial tracing and refining, the font is rendered as a preview. This allows you to see how the font will look in digital form. The preview is reviewed to flag any letters that were not traced accurately, allowing for further refinements. This iterative process ensures that the final font meets the desired quality.
Installing the Font
Once the font is refined and previewed, it can be saved as a TrueType Font (TTF) file. This file format is widely supported and can be installed on various devices. The resulting font is fully local and MIT-licensed, meaning it is free to use and distribute.
Practical Tips
Choose the Right Tool
When selecting a font editor, choose one that offers robust tracing and refining tools. Look for software that integrates AI capabilities, as this can significantly streamline the process.
Ensure Clear Handwriting
Clear and legible handwriting is essential for a successful conversion. Avoid overly stylized or elaborate scripts, as these can be more challenging to trace accurately.
Take Multiple Photos
Consider taking multiple photos of your handwritten page from different angles. This can provide you with a better perspective and ensure that all details are captured accurately.
Review and Refine
Don't rush the refining process. Take the time to review the preview and make necessary adjustments. The iterative process ensures that the final font meets the desired quality.
Backup Your Work
Regularly save and backup your work throughout the process. This can prevent any loss of progress and ensure that you have a copy of your handwritten font in various stages of development.
Important Takeaways
Creating a custom font from handwriting is a straightforward process that combines creativity and technology. By using a font editor and AI, you can convert your handwritten letters into a digital, installable font. This process allows you to capture a unique style and add a personal touch to your projects.
The ability to turn a simple photograph into a versatile digital tool highlights the advancements in AI and design software. Whether you're a designer or an enthusiast, this process opens up a world of creative possibilities.
Conclusion
The process of converting handwriting into a digital font is both fascinating and practical. By using a font editor and AI, you can turn your handwritten letters into a versatile digital tool. Whether you're looking to add a personal touch to your projects or capture a unique style, this process allows you to bring your handwriting to life in a digital format.
Watch the Reel
Questions readers ask
How do I start converting my handwriting into a digital font?
Begin by writing out the entire alphabet and any numbers you want included in your font. Make sure to use a clear, consistent style. Next, photograph the handwritten page using a high-quality camera or scanner to ensure the letters are clear.
What software can I use to convert my handwritten letters into a font?
You can use font editor tools like FontForge, BirdFont, or online platforms, which have features specifically designed for converting handwriting into a digital font. These tools help in tracing the letters and converting them into vector shapes.
How does AI enhance the process of creating a personalized font from handwriting?
AI improves the accuracy and quality of the font by assisting in distinguishing between similar letters, refining the shapes, and ensuring consistency. It can also help in predicting and correcting any anomalies in the handwriting, making the final font more polished and usable.
Can I convert a font based on a handwritten alphabet from a notebook?
Yes, you can definitely use a handwritten alphabet from a notebook. Ensure the handwriting is clear and legible to avoid issues during the digitization process. Start by photographing the page and then use the converted image in specialized software to create the font.
What are the common challenges in converting handwriting to a digital font?
Common challenges include distinguishing between similar letters (like 'u' and 'v'), maintaining consistency in letter shapes, and ensuring the font remains readable in different sizes. AI tools can significantly mitigate these issues by refining and correcting the digital outlines.
How do I ensure the quality of my digital font from handwriting?
Ensure the quality of your digital font by using a high-resolution image of your handwriting, checking for accurate tracing of each letter, and using AI tools to refine and correct any inconsistencies. Test the font in various sizes and applications to confirm its readability and usability.
What is the best way to photograph my handwriting for font conversion?
Use a high-resolution camera or scanner to photograph your handwritten page. Ensure the page is well-lit and flat to avoid shadows and distortions. Make sure the letters are clear and the edges are well-defined, as this will improve the accuracy of the vector tracing process.
Related deep dives
Similar reads based on topic and creator.

Recent articles
Fresh deep dives from the latest Reels we unpacked.

Comments
Be the first to comment.