Painting Trim: A Guide to Perfect Finishes
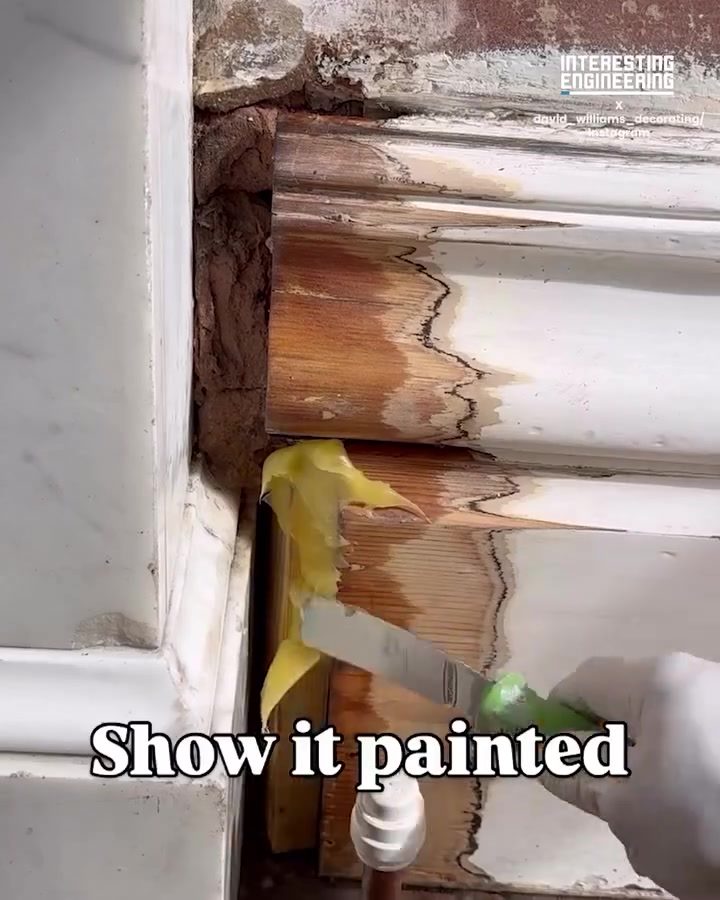
Repairing and painting trim can significantly enhance the appearance of any room, but it's often a task that homeowners dread. With the right tools and techniques, however, transforming worn or damaged trim can be a straightforward process. One key product that simplifies this task is Repair Care Dry Flex 4, a versatile filler that makes it easy to repair and repaint wooden trim. Let's dive into the process of painting trim and achieving a flawless finish.
Context: Why This Matters
Trim plays a crucial role in the overall aesthetics of a room. It adds a finished look to walls and ceilings, but over time, it can become damaged, scuffed, or chipped. Properly repairing and painting trim can restore its original beauty, making it a vital home improvement skill. Whether you're tackling a minor repair or a full room renovation, understanding the process will save you time and effort.
Main Discussion
Assessing the Damage
Before beginning any repair work, it's essential to assess the condition of your trim. Small scratches or minor chips can often be touched up with a bit of paint, but larger gaps or holes will require more attention. When dealing with significant damage, it’s important to choose the right filler to ensure a seamless finish. Repair Care Dry Flex 4 is specifically designed for such tasks. Its easy application and quick drying time make it an ideal choice for filling in gaps and smoothing out surfaces.
Preparing the Surface
Proper preparation is key to a successful paint job. Start by cleaning the trim to remove any dust, dirt, or grease. Use a mild detergent and water, then rinse and allow the surface to dry completely. For tougher stains, you may need a stronger cleaner. Next, lightly sand the trim to create a smooth surface for the filler. This step helps the filler adhere better and ensures a more even finish.
Before applying the filler, use a putty knife to apply the Repair Care Dry Flex 4 to the damaged areas. Press the filler into the gaps, shaping it to match the contour of the trim. Allow the filler to dry according to the manufacturer's instructions. This usually takes about 24 hours, but it can vary depending on humidity and temperature. After drying, sand the area again to ensure a smooth surface.
Painting the Trim
Once the filler is dry and sanded smooth, it's time to apply the paint. Choose a high-quality paint that matches the existing trim color. If you're unsure of the exact shade, consider taking a small piece of the trim to a paint store for a color match. Use a small roller or a brush to apply the paint evenly. Start with a thin coat and allow it to dry completely before applying additional coats. This approach helps prevent runs and drip marks, ensuring a smooth, professional finish.
Practical Tips
Choosing the Right Tools
Selecting the right tools can make a significant difference in the quality of your trim repair. A good putty knife is essential for applying filler smoothly. Opt for one with a flexible blade that conforms to the shape of the trim. Additionally, having a variety of sandpaper grits on hand will help you achieve a smooth finish. Start with a coarse grit to remove excess filler and transition to finer grits for a polished look.
Selecting the Right Paint
The type of paint you choose can impact the durability and appearance of your trim. For wooden trim, latex paint is often the best choice. It dries quickly, is easy to clean, and provides a durable finish. If you're painting metal trim, consider using a primer specifically designed for metal surfaces to ensure better adhesion and longevity. Always check the paint can for specific instructions and recommendations.
Important Takeaways
Painting trim doesn’t have to be a daunting task. With the right tools and techniques, you can achieve a professional finish that enhances the overall look of your room. Repair Care Dry Flex 4 is an excellent choice for filling in gaps and smoothing out surfaces, making the repair process more manageable. By following the steps outlined above, you can ensure a flawless finish that will last for years to come.
Conclusion
Repairing and painting trim is a worthwhile investment in your home's appearance. With the proper tools and a bit of patience, you can transform damaged or worn-out trim into a polished, attractive feature. Whether you're dealing with minor repairs or a full renovation, understanding the process of painting trim will help you achieve a beautiful, long-lasting finish.
Watch the Reel
Questions readers ask
What types of damage can Repair Care Dry Flex 4 address on wooden trim?
Repair Care Dry Flex 4 is designed to handle a variety of damage types on wooden trim. It can effectively fill in cracks, holes, and gaps. Moreover, it can smooth out dents, scratches, and other imperfections, making it a versatile tool for comprehensive trim repair.
How does Dry Flex 4 simplify the process of repairing wooden trim?
Repair Care Dry Flex 4 simplifies the repair process by providing a flexible, paintable surface once it dries. This eliminates the need for multiple coats or additional sanding, making the repair process more efficient and easier for homeowners.
Can Dry Flex 4 be used on both interior and exterior wooden trim?
Yes, Dry Flex 4 is suitable for both interior and exterior wooden trim. It is formulated to withstand various environmental conditions, ensuring durability and longevity for both indoor and outdoor applications.
What preparation steps are needed before using Dry Flex 4 on damaged trim?
Before applying Dry Flex 4, it's important to clean the damaged area thoroughly to remove any dirt, dust, or debris. Lightly sand the area to create a smooth surface and improve adhesion. Then, apply the filler directly to the damaged area and allow it to dry completely before painting.
How long does it take for Dry Flex 4 to dry and what is the paint application procedure?
Dry Flex 4 typically dries to the touch within 15–20 minutes, but it's recommended to allow it to cure for at least 24 hours before sanding and painting. After the filler has fully cured, gently sand the area to ensure a smooth finish and apply a coat of primer and paint for a seamless look.
Is Dry Flex 4 suitable for DIY homeowners, or is it a professional-grade product?
Dry Flex 4 is designed with both DIY homeowners and professionals in mind. Its user-friendly application and effective results make it accessible for homeowners looking to tackle trim repairs themselves. However, it also offers the quality and reliability that professionals seek.
Can Dry Flex 4 be used to repair other types of surfaces besides wooden trim?
While Dry Flex 4 is specifically formulated for wooden trim, its versatility makes it suitable for other surfaces as well. It can be used on various types of wood, including furniture, cabinetry, and baseboards. However, it's always a good idea to test a small, inconspicuous area first to ensure compatibility with the specific material.
Recent articles
Fresh deep dives from the latest Reels we unpacked.




Comments
Be the first to comment.