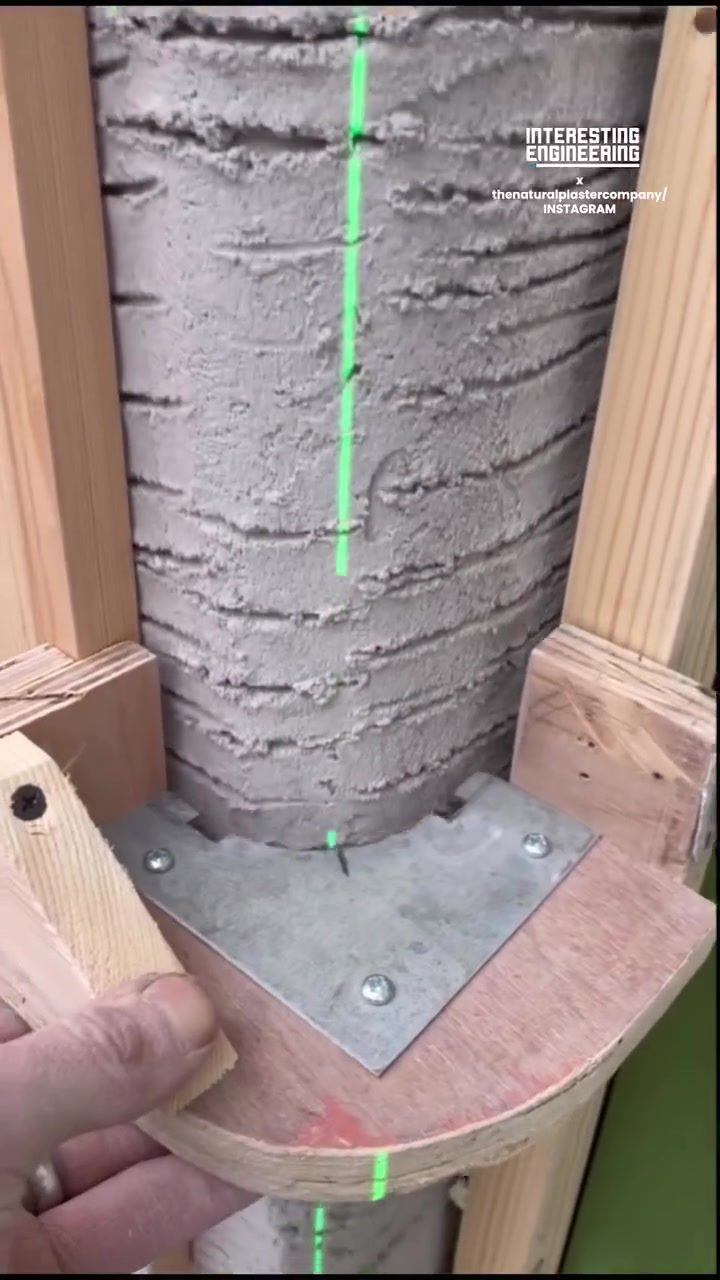
Natural Plaster Application
Natural plaster is a versatile and eco-friendly material that has gained popularity in home improvement projects. Unlike synthetic materials, natural plaster offers a unique texture and aesthetic appeal that can transform any space. Whether you're renovating an old home or building a new one, understanding the application process of natural plaster can help you achieve a beautiful, sustainable finish.
Why This Matters
Using natural plaster in construction or renovation projects offers several benefits. It provides a durable, breathable finish that can improve indoor air quality. Additionally, natural plaster is often made from sustainable materials, making it an environmentally friendly choice. The unique texture and appearance of natural plaster can add character to any space, whether it's a feature wall, a ceiling, or an entire room.
Main Discussion
Benefits of Using Natural Plaster
Natural plaster stands out due to its numerous advantages, including durability, breathability, and sustainability. It is made from natural materials like clay, lime, or gypsum, which are environmentally friendly and non-toxic. Additionally, natural plaster allows moisture to pass through, which can help prevent mold and mildew growth, making it a healthier option for indoor environments.
One of the standout features of natural plaster is its aesthetic value. Unlike smooth, synthetic materials, natural plaster offers a textured finish that can add depth and warmth to any room. This texture can also help hide minor imperfections, making it a practical choice for both new construction and renovation projects.
Application Process
Applying natural plaster involves several steps, but with the right tools and techniques, it can be a rewarding DIY project. Here’s a breakdown of the process:
-
Preparation: Begin by preparing the surface. Ensure it is clean, dry, and free of any debris. For wooden frames, apply a layer of adhesive to help the plaster adhere better.
-
Mixing the Plaster: Mix the natural plaster according to the manufacturer's instructions. Typically, you’ll need to add water to the dry plaster mixture and stir until you achieve a smooth, spreadable consistency. Thenaturalplastercompany emphasizes the importance of getting the right consistency to ensure a smooth application.
-
Applying the Plaster: Use a hawk and trowel to apply the plaster to the surface. For a wooden frame, hold the trowel at a 45-degree angle and apply the plaster in thin layers, smoothing it out as you go. The key is to work quickly but carefully to ensure the plaster sets evenly.
-
Smoothing and Finishing: Once the plaster is applied, use a smoothing tool or your trowel to create the desired texture. This step is crucial for achieving the unique, natural look that plaster is known for. For a more finished look, you can use a wood float to achieve a smoother texture that still maintains the natural appearance.
-
Touch-Ups and Finishing Touches: After the plaster has dried, you may need to do some touch-ups. Use a laser ruler and simple wooden tools to ensure that the plaster is applied evenly and to correct any imperfections.
Tools and Materials
To successfully apply natural plaster, you’ll need a few essential tools and materials:
- Natural Plaster: Choose a high-quality plaster from a reputable brand like Thenaturalplastercompany for the best results.
- Hawk and Trowel: These are essential for applying the plaster evenly.
- Smoothing Tool or Wood Float: These help achieve the desired texture and finish.
- Laser Ruler and Simple Wooden Tools: Useful for precise measurements and touch-ups.
Natural Plaster in Construction and Renovation
Natural plaster is ideal for a variety of construction and renovation projects. It can be used to create feature walls, textured ceilings, or even entire room finishes. The natural, earthy texture of plaster adds a unique charm to any space, making it a popular choice for those seeking to bring a touch of nature into their homes.
Practical Tips
- Preparation is Key: Ensure that the surface you are working on is clean, dry, and free of debris. This will help the plaster adhere better and provide a smoother finish.
- Consistency Matters: When mixing the plaster, follow the manufacturer's instructions to achieve the right consistency. A well-mixed plaster will be easier to apply and result in a smoother finish.
- Work Quickly but Carefully: Apply the plaster in thin layers and work quickly to ensure it sets evenly. Use a laser ruler and simple wooden tools to achieve precise measurements and a polished look.
- Consider Hiring a Professional: While natural plaster can be a rewarding DIY project, it can also be challenging. If you're unsure about the process or the results, consider hiring a professional.
- Practice Makes Perfect: If you're new to applying natural plaster, practice on a smaller surface before tackling a larger project. This will help you get a feel for the material and the application process.
Important Takeaways
Natural plaster is a fantastic choice for anyone looking to add a unique, sustainable touch to their home. Its durability, breathability, and aesthetic appeal make it a popular choice for both new construction and renovation projects. By understanding the application process and using the right tools, you can achieve a beautiful, natural finish that will enhance any space.
Conclusion
Whether you're building a new home or renovating an old one, natural plaster offers a versatile and eco-friendly solution. Its unique texture and aesthetic appeal can transform any space, making it a popular choice for those seeking a distinctive, natural look. By following the right techniques and using the right tools, you can successfully apply natural plaster to achieve a beautiful, sustainable finish.
Watch the Reel
Questions readers ask
What are the main benefits of using natural plaster in home remodeling?
Natural plaster offers numerous advantages, including improved indoor air quality due to its breathable nature, a unique and aesthetically pleasing textured finish, and durability. Additionally, it is an eco-friendly choice since it is made from sustainable materials like clay and lime.
Can natural plaster be used on both interior and exterior walls?
Natural plaster, particularly clay and lime plaster, is versatile and can be used on both interior and exterior walls. However, the specific type of natural plaster and its application techniques can vary depending on the location and exposure to elements, so it's important to choose accordingly.
What are the basic steps for DIY natural plastering?
The basic steps include preparing the surface by ensuring it is clean, dry, and stable; mixing the natural plaster according to the manufacturer's instructions; applying the plaster in thin layers using a trowel or other suitable tools; and allowing each layer to dry completely before applying the next.
Is natural plaster suitable for beginners in DIY projects?
Natural plaster can be suitable for beginners, as it offers a forgiving and versatile material to work with. However, it's essential to start with a small project or a less visible area to gain confidence and familiarity with the material and application techniques.
How does natural plaster contribute to better indoor air quality?
Natural plaster helps to regulate humidity and allows walls to breathe, which can prevent the buildup of mold and mildew. This breathable quality contributes to a healthier indoor environment by reducing the presence of airborne contaminants and allergens.
What tools do I need for a DIY natural plaster project?
For a DIY natural plaster project, you will need basic tools such as a trowel, hawk, mixing bucket, measuring cups, and protective gear like gloves and a dust mask. Additionally, you may need a scraper, sandpaper, and a spray bottle for wetting the surface.
How long does natural plaster take to dry and cure?
The drying and curing time for natural plaster can vary depending on the specific type and environmental conditions. Generally, clay plaster can take 24-48 hours to dry between coats, while lime plaster may take several days to a week to cure completely, allowing for a stronger, more durable finish.
Recent articles
Fresh deep dives from the latest Reels we unpacked.




Comments
Be the first to comment.