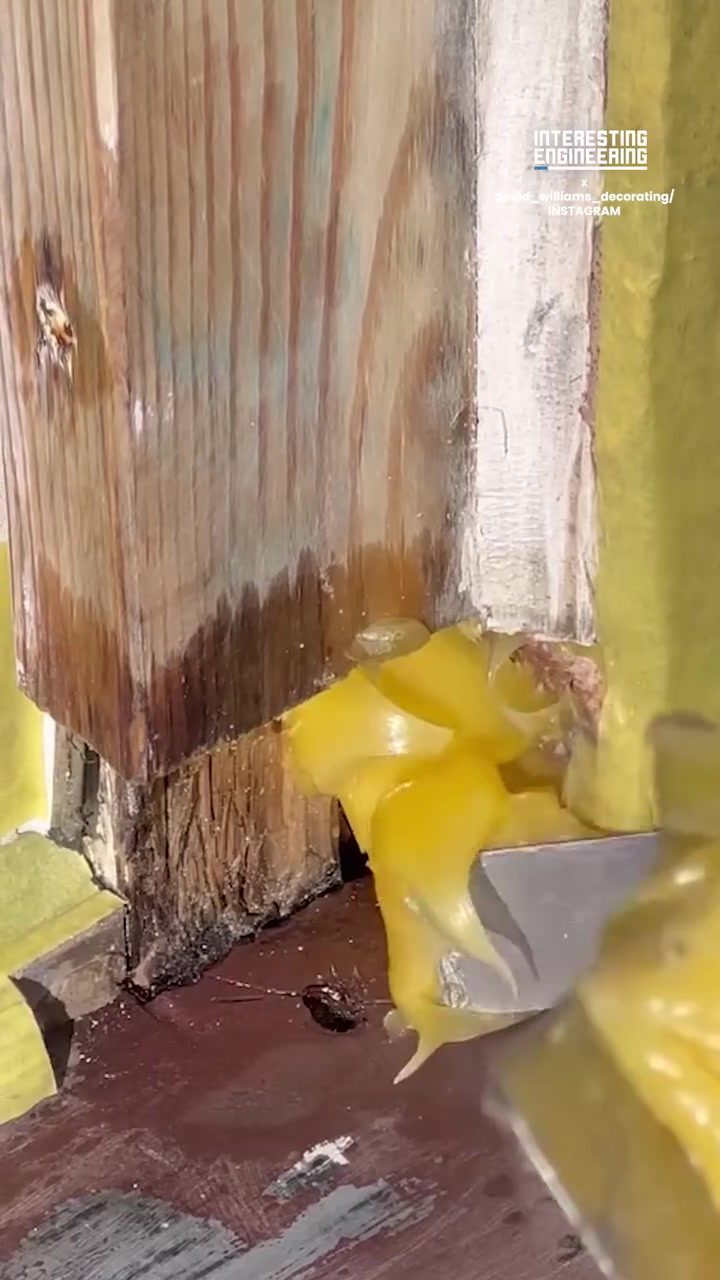
Wood Filler Application for Effective Repair
Wood filler is a versatile material used to repair cracks, holes, and other damages in wood. Whether you're dealing with a rotted exterior door frame or minor imperfections in furniture, wood filler can help restore the surface to its original condition. By understanding the application process, you can achieve a durable and seamless repair.
Why This Matters
Wooden structures and furniture are susceptible to damage over time due to various factors like weathering, pests, and general wear and tear. Repairing these damages not only enhances the aesthetic appeal but also extends the lifespan of the wood. Effective use of wood filler ensures that the repairs are robust and long-lasting, often making it difficult to distinguish the repaired areas from the original wood. The use of epoxy filler, in particular, is common for more substantial repairs.
Repairing a Rotted Exterior Door Frame
Cleaning the Damaged Area
Before applying any wood filler, it's crucial to clean the damaged area thoroughly. This step ensures that the filler adheres properly and that no contaminants interfere with the repair process. Use a wire brush or a scraper to remove any loose wood, dirt, or debris. For deeper damage, you might need to use a chisel to clean out the rotted portions and create a clean surface.
Filling the Damage
Once the area is clean, apply the wood filler. For larger repairs, such as a rotted exterior door frame, epoxy fillers like Repair Care are often recommended. Epoxy fillers are strong and durable, making them ideal for outdoor applications. Dispense the filler directly from the tube and use a putty knife to spread it evenly into the damaged area, ensuring it fills all cracks and holes completely.
Shaping and Sanding
After the filler has been applied, allow it to dry according to the manufacturer's instructions. Once dry, use a putty knife or a scraper to level the surface, removing any excess filler. Next, use medium-grit sandpaper to sand the area smoothly. This step is crucial for achieving a seamless finish. Start with a coarse grit to remove any high spots and then progress to a finer grit for a smooth surface.
Preparing for Painting
Final Sanding and Cleaning
Before painting, the repaired area should be sanded again with a fine-grit sandpaper to ensure a smooth finish. Wipe the area with a damp cloth to remove any dust or residue from the sanding process. Allow the area to dry completely before proceeding.
Application of Paint
Apply a coat of primer to seal the wood and provide a better surface for the paint to adhere to. Once the primer is dry, apply the paint. For exterior surfaces, use a high-quality, weather-resistant paint to ensure durability. Allow the paint to dry completely, and if necessary, apply a second coat for a more uniform appearance.
Practical Tips
Choosing the Right Filler
Selecting the right type of wood filler depends on the extent and location of the damage. For minor repairs, a standard wood filler will suffice. However, for more substantial damages, especially on exterior surfaces, epoxy fillers like Repair Care are recommended. Epoxy fillers are stronger and more resistant to weathering, making them ideal for outdoor repairs.
Proper Application Techniques
When applying the filler, use a putty knife or a similar tool to ensure even distribution. For deeper cracks or holes, you may need to apply the filler in layers, allowing each layer to dry before adding the next. This approach ensures that the filler sets properly and provides a sturdy repair.
Allow for Drying Time
Always follow the manufacturer's instructions for drying times. Applying paint or varnish too soon can compromise the integrity of the repair. Allow the filler to dry completely before moving on to the next steps.
Important Takeaways
Importance of Preparation
Proper preparation is key to a successful wood filler repair. Cleaning and shaping the damaged area ensures that the filler adheres well and provides a durable repair.
Choosing the Right Tools
Having the right tools, such as a putty knife, sandpaper, and a scraper, makes the process smoother and more effective. Investing in good-quality tools can significantly improve the outcome of your repair.
Following Manufacturers' Instructions
Always follow the manufacturer's instructions for mixing, applying, and drying the filler. This ensures that the repair is done correctly and that the filler performs as intended.
Finishing Touches
Sanding and painting the repaired area carefully gives it a polished, seamless finish. This step is essential for achieving a professional-looking repair.
Conclusion
Repairing a rotted exterior door frame or any other wood damage using wood filler is a straightforward process that can yield excellent results. By following the steps of cleaning, filling, shaping, sanding, and painting, you can restore the wood to its original condition. Using high-quality materials like Repair Care epoxy filler and adhering to best practices ensures that your repair will be durable and long-lasting.
Watch the Reel
Questions readers ask
What makes epoxy filler a good choice for repairing a rotted door frame?
Epoxy filler is ideal for repairing a rotted door frame because it creates a strong, durable bond that can withstand various environmental conditions. It effectively fills in the damaged areas, restoring the structural integrity of the door frame and providing a long-lasting solution.
Can epoxy filler be used on both interior and exterior door frames?
Yes, epoxy filler can be used on both interior and exterior door frames. It is particularly useful for exterior door frames due to its resistance to moisture and weathering, making it a reliable choice for outdoor repairs.
What steps should I follow to prepare the rotten wood before applying epoxy filler?
Before applying epoxy filler, remove any loose or rotted wood using a chisel or screwdriver. Clean the area thoroughly to eliminate dust and debris. Then, use a wire brush to roughen the surface, which helps the epoxy to adhere better. Finally, apply a wood hardener to prevent further rot and strengthen the remaining wood.
How do I mix and apply epoxy filler to a rotted door frame?
Follow the manufacturer's instructions to mix the epoxy filler components in the correct ratio. Use a putty knife or trowel to apply the filler to the damaged areas, pressing it firmly into the wood. Smooth the surface and allow it to cure according to the product guidelines, usually 24-72 hours.
What should I do if the rotten area is too large to fill with epoxy?
If the rotten area is extensive, it might be necessary to reinforce the door frame with additional support, such as a wooden spline or a metal plate. After reinforcing, you can apply the epoxy filler to ensure a strong and stable repair. In severe cases, it may be best to consult a professional for advice.
Can I paint or stain the door frame after using epoxy filler?
Yes, once the epoxy filler has fully cured, you can sand the repaired area to create a smooth surface. After sanding, you can apply a primer, then paint or stain the door frame to match the surrounding wood. This step helps to conceal the repair and blend it seamlessly with the rest of the door frame.
How long does an epoxy-filled repair on a door frame typically last?
When applied correctly, an epoxy-filled repair on a door frame can last for many years, even decades. The durability of the repair depends on the quality of the epoxy used, the preparation of the wood, and the environmental conditions the door frame is exposed to. Regular maintenance and inspections can further extend the lifespan of the repair.
Recent articles
Fresh deep dives from the latest Reels we unpacked.




Comments
Be the first to comment.