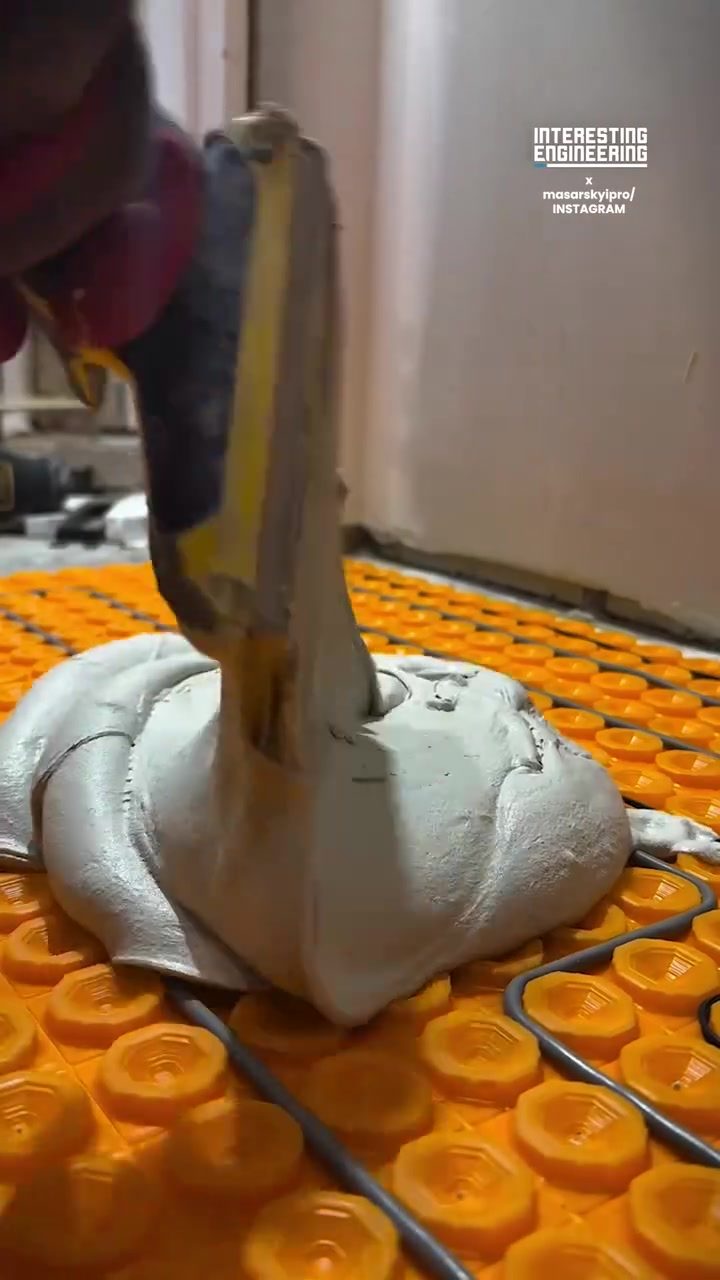
Tile Installation Over a Heated Membrane System
Installing tiles over a heated membrane system is a smart way to achieve a warm, comfortable floor with a precise finish. This method involves embedding floor-heating cables below a membrane system, which is then covered with tiles. By using hexagonal tiles and a generous amount of adhesive, you can ensure that the floor not only looks great but also provides efficient heat distribution.
Why This Matters
Choosing the right tile installation method is crucial for both functional and aesthetic reasons. With the rising popularity of heated floors, understanding the best practices for tiling over a heated membrane system becomes essential. This method ensures even warmth, enhances energy efficiency, and provides a durable, attractive finish. Whether you're a DIY enthusiast or planning to hire a professional, knowing the ins and outs of this process can save you time, money, and potential headaches.
Main Discussion
The Benefits of Heated Floors
Heated floors offer numerous advantages, making them a popular choice for modern homes. One of the primary benefits is the comfort they provide. Walking on a warm floor on a cold morning is a luxury that can significantly enhance your daily routine. Additionally, heated floors are energy-efficient, as they distribute heat evenly across the floor, reducing the need for additional heating sources.
The Role of the Membrane System
The membrane system plays a critical role in the installation process. It acts as a barrier between the heating cables and the tiles, ensuring that the heat is distributed evenly. This system also protects the cables from damage during the tiling process. The membrane is typically made of a flexible, durable material that can withstand the weight and pressure of the tiles.
Hexagonal Tiles: A Unique Choice
Hexagonal tiles offer a distinctive look that can add a modern touch to any space. Their unique shape allows for intricate patterns and designs, making them a popular choice for both residential and commercial spaces. In addition to their aesthetic appeal, hexagonal tiles can help create a more stable and even surface, as they interlock with each other, reducing gaps and ensuring a solid foundation.
Using Tile Adhesive Effectively
Tile adhesive is a crucial component in the installation process. A generous amount of adhesive ensures that the tiles are securely attached to the membrane system, providing a stable and durable finish. When applying the adhesive, it's important to use the right amount to avoid excess moisture and ensure proper adhesion.
The Installation Process
The installation process involves several steps, each of which is critical for achieving a precise finish. Here's a breakdown of the key stages:
-
Preparation: Start by preparing the surface where the membrane system will be installed. Ensure that the surface is clean, dry, and free of debris. This step is crucial for ensuring a smooth and even application of the adhesive.
-
Laying the Membrane System: Carefully lay the membrane system over the prepared surface, ensuring that it covers the entire area. The membrane should be securely attached to the surface, with the heating cables embedded evenly.
-
Applying the Adhesive: Apply a generous amount of tile adhesive to the membrane system. The adhesive should be spread evenly, creating a smooth and consistent layer.
-
Placing the Tiles: Carefully place the hexagonal tiles on the adhesive, ensuring that they are evenly spaced and aligned. Use tools to aid in the placement and adhesion process, ensuring that the tiles are firmly secured.
-
Finishing Touches: Once the tiles are in place, allow the adhesive to dry completely. This step can take several hours, depending on the type of adhesive and the environmental conditions. After the adhesive has dried, you can add any finishing touches, such as grout, to complete the installation.
Practical Tips
Choosing the Right Tools
Having the right tools can make the installation process much easier. Some essential tools to consider include:
- Trowel: A high-quality trowel is necessary for spreading the adhesive evenly.
- Tile Spacers: These tools help ensure that the tiles are evenly spaced, creating a consistent and polished look.
- Leveling Tool: This tool helps ensure that the tiles are level and properly aligned, preventing any uneven surfaces.
Tips for Applying Adhesive
Applying the adhesive correctly is crucial for a successful installation. Here are some tips to keep in mind:
- Use the Right Amount: Applying too much or too little adhesive can lead to problems. Use a generous but controlled amount to ensure proper adhesion.
- Spread Evenly: Make sure the adhesive is spread evenly across the surface. This helps in creating a smooth and consistent finish.
Maintaining Your Heated Floor
Once your heated floor is installed, it's important to maintain it properly to ensure longevity and efficiency. Regular cleaning and inspection can help keep the floor in good condition. Avoid using harsh chemicals or abrasive materials, as they can damage the tiles and the membrane system.
Important Takeaways
- Heated floors provide comfort and energy efficiency.
- The membrane system ensures even heat distribution and protects the heating cables.
- Hexagonal tiles offer a unique aesthetic and a stable foundation.
- Proper use of tile adhesive is critical for a secure and durable finish.
- Choosing the right tools and techniques can save time and effort during installation.
Conclusion
Installing tiles over a heated membrane system is a fantastic way to achieve a warm, comfortable, and attractive floor. By understanding the benefits, tools, and techniques involved in the process, you can ensure a successful and long-lasting installation. Whether you're tackling the project yourself or hiring a professional, the key to a precise finish lies in careful planning, the right tools, and attention to detail.
Watch the Reel
Questions readers ask
What are the benefits of using hexagonal tiles for heated floors?
Hexagonal tiles offer a modern, stylish look and ensure even heat distribution when used with a heated membrane system. They are an excellent choice for those aiming to enhance the aesthetic appeal of their flooring while maintaining comfortable warmth throughout the space.
Can I install hexagonal tiles over an existing heated membrane system?
Yes, you can install hexagonal tiles over an existing heated membrane system. However, ensure the membrane is in good condition and that the heating cables are functioning correctly. Always consult the manufacturer's guidelines for specific instructions related to your system.
What type of adhesive should I use for installing hexagonal tiles on heated floors?
Use an adhesive specifically designed for heated floors. These adhesives are formulated to withstand temperature changes and ensure a strong bond between the tiles and the heated membrane. Always check the adhesive's compatibility with both the tiles and the heating system.
How do I ensure even heat distribution with hexagonal tiles on a heated floor?
To ensure even heat distribution, use a generous amount of adhesive when installing the hexagonal tiles. This helps to create a flat, even surface that allows the heat to distribute uniformly. Additionally, follow the manufacturer's instructions for laying the heating cables and tiles.
What are the safety precautions to keep in mind while installing tiles over a heated membrane system?
Always turn off the heating system before beginning the installation process. Wear appropriate safety gear and follow the manufacturer's guidelines. Make sure to test the system after installation to ensure there are no issues with the heating cables or tiles.
Can I DIY the installation of hexagonal tiles on a heated floor?
Yes, DIY installation is possible with the right tools and materials. Ensure you have a clear understanding of the process and follow the manufacturer's instructions closely. If you're unsure about any aspect, consider consulting a professional to avoid potential issues.
How can I enhance the energy efficiency of my heated floor with hexagonal tiles?
To enhance energy efficiency, ensure that the tiles are properly installed, that the heating cables are evenly spaced, and that the membrane system is in good condition. Insulating the subfloor and using a programmable thermostat can also help to optimize energy use and maintain comfortable warmth.
Recent articles
Fresh deep dives from the latest Reels we unpacked.




Comments
Be the first to comment.