Roofing Membrane Application: A Critical Step in Roofing Repair and Installation
Roofing membranes play a crucial role in protecting buildings from weather damage, and their proper application is essential for ensuring longevity and durability. This process involves using specialized tools and techniques to lay and secure the membrane effectively. The process is demonstrated in the context of a new or repaired roof.
Why This Matters
Properly applied roofing membranes are essential for protecting buildings from weather damage. Whether it's a new construction or a repair, the correct installation of a roofing membrane can significantly extend the lifespan of a roof and prevent costly repairs down the line. Understanding the process and the tools involved is crucial for both professional roofers and DIY enthusiasts.
Main Discussion
Tools and Materials
When applying a roofing membrane, several key tools and materials are required. These include:
- Blowtorch: Used to heat and melt the tar lining of the membrane, allowing it to adhere smoothly to the roof surface.
- Rolled membrane: The primary material being applied to the roof.
- Roller: Ensures the membrane is firmly pressed into place, creating a secure and waterproof seal.
Step-by-Step Process
Preparing the Roof Surface
Before applying the roofing membrane, the roof surface must be thoroughly prepared. This involves:
- Cleaning: Removing any debris, dirt, or loose materials.
- Drying: Ensuring the surface is completely dry to allow for proper adhesion of the membrane.
- Repairing: Fixing any damages, such as cracks or holes, to create a smooth surface.
Applying the Membrane
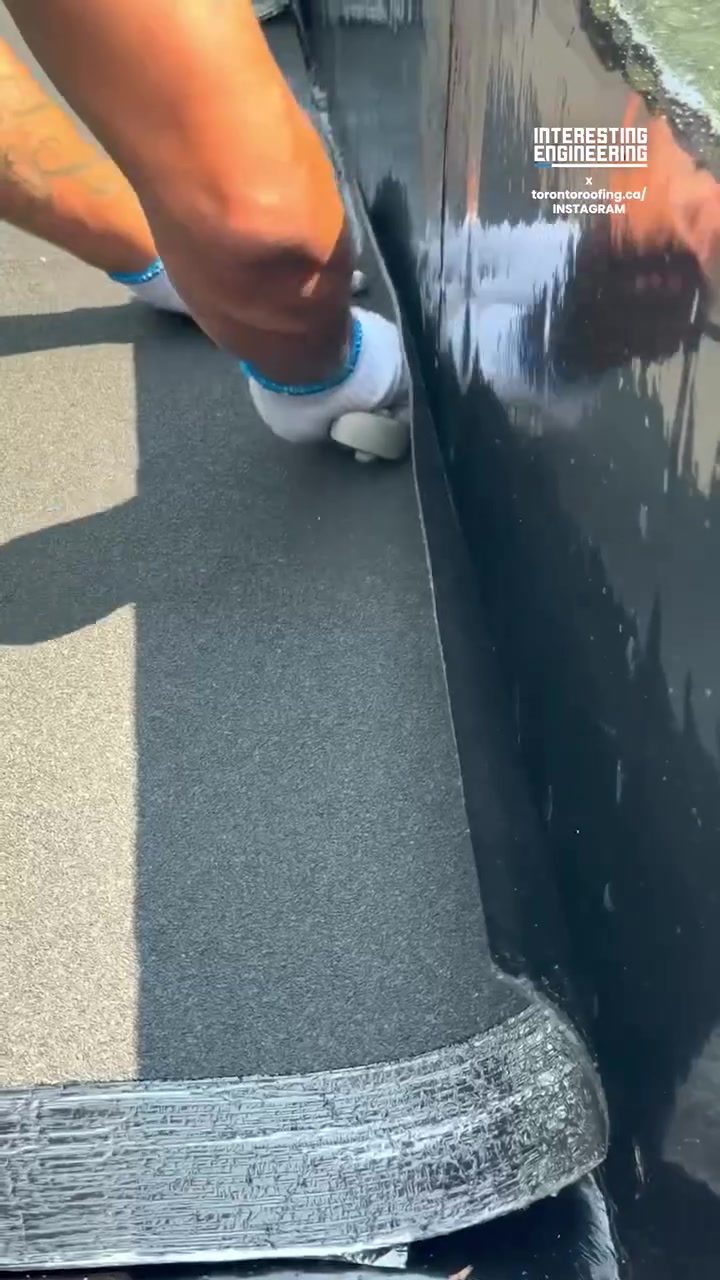
The application process begins with unrolling the membrane over the roof surface. A blowtorch is used to carefully heat the tar lining, which makes the membrane more pliable and helps it adhere better to the roof. The worker ensures the membrane is laid smoothly and evenly, avoiding any wrinkles or bubbles that could compromise the seal.
Sealing the Membrane
Once the membrane is in place, a roller is used to firmly press it onto the roof. This step is crucial as it creates a secure and waterproof seal, preventing water from seeping through and causing damage. The roller ensures that the membrane is evenly distributed and adheres tightly to the roof surface.
Finishing Touches
After the membrane is securely in place, any excess material is trimmed away, and the edges are sealed. This final step ensures that the entire roof is protected and that there are no gaps or weak points where water could enter.
Practical Tips
- Use Protective Gear: Always wear appropriate protective gear, including gloves and safety glasses, when working with a blowtorch and roofing materials.
- Work in Sections: For large roofing projects, consider working in smaller sections to ensure the membrane remains manageable and to maintain a consistent seal.
- Check for Leaks: Regularly inspect the membrane for any signs of leaks or weak spots, especially after severe weather conditions.
- Avoid Overheating: Be cautious with the blowtorch to avoid overheating the membrane, which could cause it to degrade or become brittle.
- Maintenance: Regularly inspect and maintain the roofing membrane to extend its lifespan and ensure continued protection.
Important Takeaways
- Roofing membranes are essential for protecting buildings from weather damage.
- Proper preparation of the roof surface is crucial for the successful application of the membrane.
- Tools like blowtorches and rollers are necessary for ensuring a secure and waterproof seal.
- Regular maintenance and inspection of the membrane are key to extending its lifespan and protecting the roof.
Conclusion
The application of a roofing membrane is a critical step in roofing repair and installation. By understanding the tools and techniques involved, you can ensure a durable, weather-resistant roof that protects your building for years to come. Whether you are a professional roofer or a DIY enthusiast, following the proper steps and using the right tools will make all the difference in the longevity and effectiveness of your roofing membrane.
Watch the Reel
Questions readers ask
What are the essential tools needed for roofing membrane application?
The essential tools for applying roofing membranes include utility knives, measuring tapes, chalk lines, and a membrane roller, as well as sealants and adhesives. Specialized tools like heat guns or torches may also be required, depending on the type of membrane being installed. Additionally, safety gear such as gloves, goggles, and protective clothing are crucial for safe application.
How can I prepare the roof surface for membrane application?
Surface preparation is crucial for effective membrane application. First, ensure the roof is clean and dry, free from debris, dirt, and moisture. Inspect the roof for any damage or irregularities and repair them before applying the membrane. Depending on the type of membrane, you may need to use a primer to enhance adhesion and durability.
What are the common techniques for applying roofing membranes?
The common techniques for applying roofing membranes include mechanically attaching, adhesive bonding, and heat welding. Mechanically attaching involves securing the membrane with fasteners, while adhesive bonding uses adhesives to secure the membrane to the roof. Heat welding, often used for thermoplastic membranes, uses a heat gun or torch to fuse the membrane to the roof and seams.
How can properly applied roofing membranes protect a building from weather damage?
Properly applied roofing membranes create a seamless, weatherproof barrier that protects the building from water, wind, and other environmental elements. By adhering to the surface and sealing all seams and edges, the membrane prevents water infiltration and damage, ensuring the roof's longevity and structural integrity.
What are the benefits of using roofing membranes for repair and installation?
Using roofing membranes for repair and installation provides numerous benefits, including enhanced weatherproofing, extended roof lifespan, and reduced repair costs. The membranes offer a durable and flexible solution that adapts to various roofing conditions, making them ideal for both new installations and repairs. Additionally, they can be installed quickly and efficiently, minimizing downtime and costs.
How can I ensure the longevity of my roofing membrane?
To ensure the longevity of your roofing membrane, prioritize proper installation and regular maintenance. This includes conducting regular inspections to identify any signs of wear or damage, promptly addressing any issues, and maintaining the membrane in accordance with the manufacturer's recommendations. Additionally, keeping the roof clean and free of debris can significantly extend the membrane's lifespan.
What safety precautions should I take during roofing membrane application?
Safety is paramount during roofing membrane application. Always wear appropriate protective gear, including gloves, goggles, and protective clothing. Ensure the roof surface is stable and secure before working, and be cautious when using heat sources like torches or heat guns. Proper ventilation and adherence to safety protocols can prevent accidents and ensure a safe working environment.
Recent articles
Fresh deep dives from the latest Reels we unpacked.




Comments
Be the first to comment.