DIY Grass Paver
Creating a beautiful and functional outdoor space can be a rewarding DIY project. One popular method for enhancing outdoor aesthetics and functionality is by using grass pavers. These pavers not only provide a natural, green look but also offer practical benefits such as being permeable, which allows water to drain through, and their ease of installation.
Creating Your Own Grass Pavers
Grass pavers are an excellent solution for creating pathways, patios, or even an entire yard. They are durable and can withstand foot traffic, making them a versatile option for any outdoor space. A mold is filled with a soil and grass mixture, then compressed, creating sturdy pavers. These pavers are then laid out to form a permeable, aesthetically pleasing surface.
Materials and Tools
To create your own grass pavers, you will need:
- A mold (a small rectangular or square frame)
- Soil
- Grass seed or sod
- A tire or heavy object for compressing the mixture
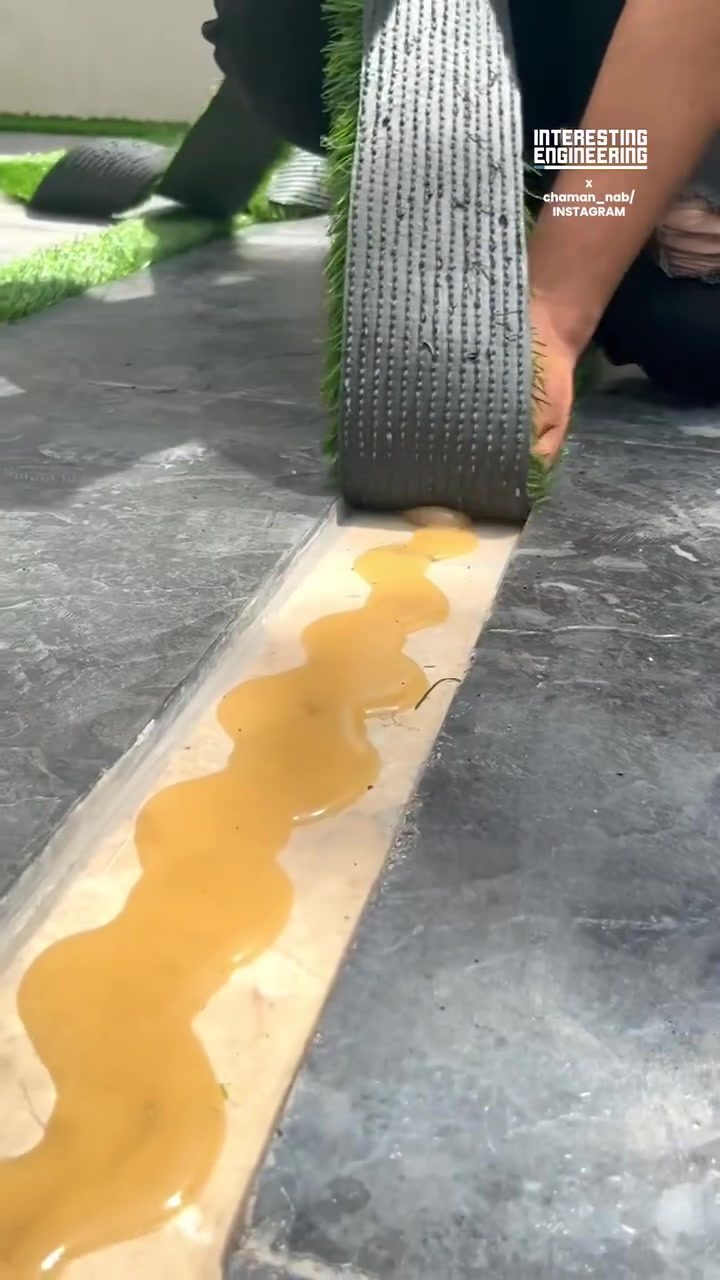
- Adhesive glue (for installing artificial turf)
Step-by-Step Process
-
Prepare the Mold: Start by filling your mold with a mixture of soil and grass. If you are using grass seed, you can sprinkle it evenly over the soil. If you are using sod, cut it into small pieces and place them inside the mold, ensuring they are well-covered with soil.
-
Compress the Mixture: Once the mold is filled, use a tire or heavy object to compress the soil and grass mixture. This step is crucial as it ensures the pavers are sturdy and stable. The compression helps to remove any air pockets and creates a dense, firm surface.
-
Remove the Mold: Carefully remove the mold to reveal your newly created grass paver. Repeat the process until you have enough pavers to cover your desired area.
-
Install the Pavers: Place the pavers on the surface where you want to create your walkway or patio. Ensure they are level and properly aligned. For artificial turf installation, you might need to use adhesive glue to secure the turf edges.
Tips for Success
-
Use the Right Amount of Adhesive: When installing artificial turf, applying the right amount of adhesive is crucial. Too much glue can cause the turf to become stiff and unnatural, while too little can lead to poor bonding and loose edges. Use a wavy glue application for better adhesion.
-
Align Turf Edges Carefully: When installing turf, align the edges carefully to ensure a seamless finish. Press the edges together and smooth the surface to create a natural-looking, durable finish.
-
Consider the Surface: Make sure the surface where you are installing the pavers is level and stable. This will ensure that the pavers are secure and long-lasting.
Practical Tips
Creating grass pavers is a straightforward process, but there are some tips to help you achieve the best results.
Choosing the Right Soil
The type of soil you use can significantly impact the quality of your pavers. Use a well-draining soil mix to ensure that water can flow through the pavers, preventing waterlogging and root rot. A good mix includes a combination of topsoil, compost, and sand.
Maintaining Your Grass Pavers
-
Water Regularly: Just like any other grass, the pavers will need regular watering, especially during the initial stages of growth. Ensure the soil remains moist but not waterlogged.
-
Mow Carefully: If you are using natural grass, you will need to mow it regularly. Use a mower with adjustable heights to avoid damaging the pavers. Be mindful of the edges and use a string trimmer to keep them neat.
-
Weed Control: Grass pavers can sometimes be prone to weed growth. Regular weeding and the use of weed control methods can help keep your pavers looking neat and tidy.
Important Takeaways
Creating DIY grass pavers is a cost-effective and eco-friendly way to enhance your outdoor space. By following the steps and tips outlined above, you can create a durable, natural-looking surface that is both functional and aesthetically pleasing. The use of a tire to compress the soil and grass mixture ensures that the pavers are sturdy and long-lasting. Additionally, the permeable nature of the pavers allows for proper drainage, preventing waterlogging and other moisture-related issues.
Conclusion
DIY grass pavers are a versatile and practical solution for outdoor spaces. Whether you are creating a pathway, patio, or an entire yard, these pavers offer a natural, green look that is both durable and functional. By following the step-by-step process and practical tips provided, you can create a beautiful and long-lasting outdoor space that you and your family will enjoy for years to come. So, gather your materials, get your hands dirty, and start creating your own DIY grass pavers today!
Watch the Reel
Questions readers ask
What are the benefits of using DIY grass pavers for outdoor spaces?
DIY grass pavers offer several advantages, including a natural, green appearance, durability, and permeability. This allows water to drain through, reducing runoff and promoting better water management in your outdoor space.
Can I use DIY grass pavers for both high-traffic and low-traffic areas?
Yes, DIY grass pavers are versatile and suitable for both high-traffic and low-traffic areas. They can withstand significant foot traffic, making them ideal for pathways, patios, or even driveways.
What kind of soil and grass mixture is best for creating grass pavers?
A well-draining soil mix combined with suitable grass seeds or sod is ideal for creating grass pavers. Ensure the soil has a good balance of nutrients and organic matter to support healthy grass growth.
Do I need any special adhesive for installing DIY grass pavers?
When installing DIY grass pavers, you typically do not need special adhesives. The pavers are designed to interlock and can be secured with a base layer of gravel or sand, ensuring stability and proper drainage.
How do I maintain my DIY grass paver surface?
Maintaining your DIY grass paver surface is simple. Regularly mow the grass to keep it at a consistent height, water it as needed, and remove any debris or weeds that may accumulate between the pavers.
Can DIY grass pavers be used in areas with heavy rainfall?
Yes, DIY grass pavers are particularly well-suited for areas with heavy rainfall. Their permeable nature allows water to drain through, reducing the risk of flooding and helping to manage excess water effectively.
Are there alternatives to natural grass for DIY grass pavers?
While natural grass is the most common choice, some DIY enthusiasts opt for artificial grass for their pavers. Artificial grass requires less maintenance and can be a good option for those who want a consistently green look without the upkeep of natural grass.
Recent articles
Fresh deep dives from the latest Reels we unpacked.




Comments
Be the first to comment.