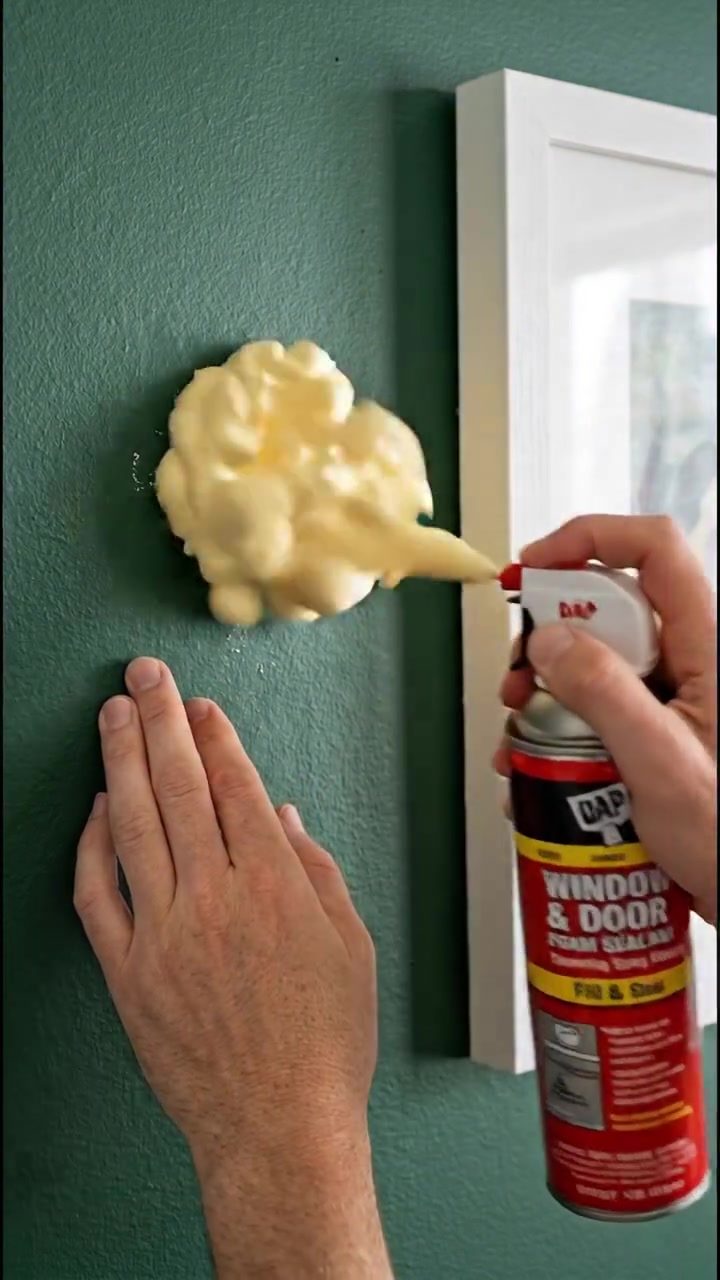
Watch the Reel
Repairing Wall Anchors: A Guide to Fixing Damaged Drywall
Wall damage from blown-out anchor holes is a common issue in homes. Whether from heavy furniture or decorative items, these holes can mar the appearance of your walls. Thankfully, a simple and effective method exists to repair these blemishes using expanding foam sealant, creating a rock-solid patch that blends seamlessly with your existing wall.
Why This Matters
Repairing anchor holes is more than an aesthetic concern; it's about maintaining the integrity and value of your home. Pancake-thin patches often mean the repair is temporary, at best. But with the right tools and techniques, you can achieve a durable, long-lasting fix.
Deep Dive into Fixing Walls
Understanding the Problem
Anchor holes develop when screws or nails are removed from the wall, leaving behind unsightly gaps. These holes can range from minor to severe, depending on the size of the anchor and the weight of the item it supported. If left unaddressed, anchor holes can become larger over time and may even cause damage to the surrounding drywall.
Tools and Materials
To tackle this repair, you'll need a few essential items:
- Expanding foam sealant: Typically used for sealing gaps around windows and doors, this versatile product is perfect for filling wall holes. DAP foam sealant is a popular choice for its reliability and durability.
- Mesh patch: This is a flexible material that helps reinforce the repaired area and ensures a smooth surface.
- Painting supplies: To match the repaired area to the rest of the wall, you'll need paint, a brush, and possibly a roller and some painter's tape.
Step-by-Step Process
1. Prepare the Area
Begin by cleaning the area around the hole to remove any dust or debris. If necessary, use a small screwdriver or knife to gently enlarge the hole, creating a more defined edge that will better hold the foam.
2. Apply the Foam Sealant
Insert the straw or nozzle of the foam sealant can into the hole. Apply a small amount of foam, ensuring it fills the hole completely. Be careful not to overfill, as the foam will expand. If you're using a brand like DAP, which comes with a precise nozzle, you can easily control the amount of foam.
3. Allow the Foam to Expand and Dry
Give the foam time to expand and dry according to the manufacturer's instructions. This usually takes around 15-30 minutes. Once dry, you can trim any excess foam with a knife, creating a flat, even surface.
4. Reinforce with a Mesh Patch
Apply a mesh patch over the foam using a small amount of joint compound. Let it dry completely. This step adds strength to the repair and provides a smooth surface for painting. Use a putty knife to apply the joint compound in thin layers, and sand lightly between coats to ensure a seamless finish.
5. Paint the Repair
After allowing the patch to dry thoroughly, paint the repaired area to match the surrounding wall. Use a small brush to carefully apply the paint, blending it seamlessly with the rest of the wall. This step is crucial for achieving a flawless finish that hides the repair completely.
Benefits of the Foam Method
The foam method offers several advantages:
- Durability: Foam sealant provides a strong and stable base for the repair, ensuring it remains intact over time.
- Versatility: This method can be used on various wall types, including drywall and plaster.
- Cost-effective: The materials required are generally inexpensive and readily available at most hardware stores.
Practical Tips
Choosing the Right Foam Sealant
When selecting foam sealant, look for a product that is specifically designed for indoor use and is low in VOCs (volatile organic compounds) for better indoor air quality. Brands like DAP offer a variety of foam sealants for different applications, so choose one that best suits your needs.
Preventing Future Issues
To prevent future anchor holes, consider using drywall anchors designed for heavy objects. These anchors distribute weight more evenly and are less likely to cause damage to the drywall. Additionally, if you know your furniture or decorations weigh more than average, consider installing shelf brackets or using other mounting solutions that can handle the load.
Important Takeaways
- Expanding foam sealant is an effective and durable solution for repairing blown-out anchor holes in drywall.
- The process includes cleaning the area, applying foam, reinforcing with a mesh patch, and painting to match the wall.
- This method is suitable for various wall types and can be performed with minimal tools and materials.
Conclusion
Repairing anchor holes in your walls doesn't have to be a daunting task. With the right approach and materials, you can achieve a professional-looking fix that will keep your walls looking their best for years to come. By using expanding foam sealant, you can ensure a rock-solid patch that blends seamlessly with the rest of your wall, making the repair virtually invisible.
Key points
- Anchor holes in drywall can be repaired with expanding foam sealant and mesh patches for a durable, seamless fix.
- Repairing anchor holes is crucial for maintaining the home's integrity and value, not just aesthetics.
- Anchor holes form when screws or nails are removed, leaving gaps that can enlarge over time and damage surrounding drywall.
- Tools and materials needed include expanding foam sealant, a mesh patch, and painting supplies to ensure a smooth, matching repair.
- Prepare the area by cleaning and possibly enlarging the hole for better foam application, and apply the foam sealant carefully to avoid overfilling.
- Allow the foam to expand, dry, and trim it to create a flat surface, then reinforce with a mesh patch and joint compound for a smooth finish.
- Paint the repaired area to seamlessly match the surrounding wall, ensuring the repair is both durable and visually unnoticeable.
FAQ
Blown-out wall anchors typically result from using screws that are too long or applying too much force. To avoid this, use appropriately sized anchors and screws, and carefully align your furniture or items before tightening. Additionally, consider using wall plugs or toggle bolts for heavier items.
It's best to use a polyurethane foam sealant designed for foam wall repair. These sealants expand to fill the hole completely and harden into a solid, stable material. Avoid using silicone or other types of sealants, as they may not provide the necessary strength or adhesion.
For this DIY project, you will need expanding foam sealant, a caulking gun, a utility knife, sandpaper, a putty knife, joint compound, and optionally, a small drill for removing anchors. Additionally, have some rags or a drop cloth to protect your workspace.
To achieve a seamless blend, apply the foam sealant in thin layers, allowing each layer to expand and harden before applying the next. Once the foam is fully cured, use a utility knife to trim the excess, and then sand the area smooth. Apply joint compound and sand again, then paint over the repaired area to match the rest of the wall.
If the foam sealant expands too much and creates a bulge, allow it to fully cure and harden. Once cured, use a utility knife to carefully cut away the excess foam. Sand the area smooth, apply joint compound and let it dry. Sand again, then paint over the area to match your wall.
It is not safe to use foam sealant around electrical outlets or wires. Keep a safe distance of at least 6 inches from any electrical components. If you suspect there may be electrical wires behind the wall, use a stud finder or consult a professional before proceeding with the repair.
The curing time for foam sealant varies by brand, but it typically takes 24 to 48 hours for the foam to fully harden. After curing, you can apply joint compound and sand the area. Once the surface is smooth, you can paint over the repaired area.
Products
Share this article
Related deep dives
Similar reads based on topic and creator.
Recent articles
Fresh deep dives from the latest Reels we unpacked.




Comments
Be the first to comment.