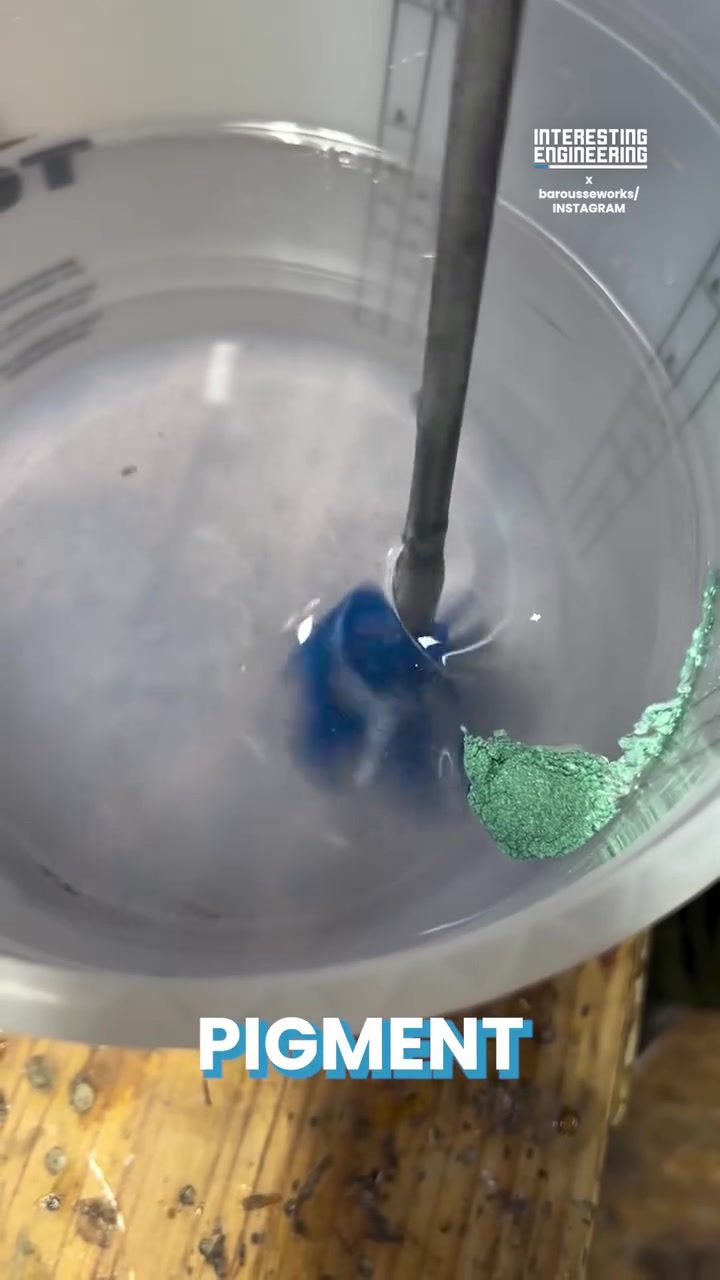
Resin Pigment Mixing Techniques
Mixing color pigments into clear resin to create vibrant, pearlescent effects is an essential skill for anyone working with resin crafting. Whether you're a hobbyist or a professional, mastering the technique to achieve a smooth, swirled effect can significantly enhance your final product. Here’s a comprehensive guide to help you understand the process and achieve stunning results.
Why This Matters
Resin is a versatile material used in various applications, from jewelry making to home decor. Its ability to produce clear, glass-like finishes makes it perfect for showcasing colors and designs. Additions of pigments can transform a clear resin mixture into a visually striking piece of art. Swirling different colors within the resin to create a marbled effect is a popular technique that adds depth and character to the final product.
Creating Vibrant Resin Colors
Choosing the Right Pigments
The first step in creating vibrant resin colors is selecting the right pigments. There are several types of pigments available, each with its unique properties. Some pigments may be more suited for specific projects or effects. For example, pearlescent pigments can create a lustrous, iridescent finish, while opaque pigments can produce bold, solid colors. Experimenting with different pigments allows you to find the perfect shade and effect for your project.
Mixing Pigment into Clear Resin
Mixing pigment into clear resin is a crucial step in achieving the desired color and effect. Use a drill to mix the pigment evenly into the resin. This method ensures that the color is distributed evenly, creating a smooth, pearlescent blend. The key is to mix the pigments thoroughly without introducing too many air bubbles, which can ruin the final product. A slow, steady pace ensures a uniform distribution. The process involves layering different colored pigments in a container and using a metal rod to swirl them together. This technique creates a visually striking marbled effect.
Achieving the Perfect Swirl
The swirling technique is essential for creating a visually appealing marbled effect. To achieve the perfect swirl, follow these steps:
-
Prepare Your Materials: Gather your clear resin, pigments, mixing rod, and a container. Ensure that all materials are clean and free of debris.
-
Mix the Pigments: Add your chosen pigments to the clear resin. Use a drill to mix the pigments thoroughly, ensuring an even distribution.
-
Swirl the Pigments: Once the pigments are evenly mixed, use a metal rod to swirl them together. The swirling motion helps create a marbled effect, adding depth and character to the final product. Repeat the process until you achieve the desired effect.
-
Pour and Set: Pour the mixed resin into your mold or container and let it set. Be mindful of the curing time, as this can vary depending on the type of resin used. Properly curing the resin ensures a durable, long-lasting finish.
Practical Tips
Avoiding Air Bubbles
Air bubbles can be a common issue when working with resin. To avoid them, use a drill to mix the pigments into the resin. The drill helps to evenly distribute the pigments without introducing too many air bubbles. You can also use a heat gun or a torch to pop any remaining bubbles before the resin sets.
Safety Precautions
Working with resin can be messy and potentially hazardous. Always wear protective gear, including gloves and a respirator. Work in a well-ventilated area to avoid inhaling harmful fumes. Follow the manufacturer's instructions for handling and disposing of resin and pigments.
Experimenting with Techniques
Don't be afraid to experiment with different techniques and pigments. Try layering different colors or using a variety of pigments to achieve unique effects. As you become more comfortable with the process, you'll find that there are endless possibilities for creating beautiful, unique resin pieces.
Important Takeaways
Uniform Distribution
Ensuring that the pigments are evenly distributed throughout the resin is crucial for achieving a smooth, pearlescent finish. Using a drill to mix the pigments helps to create a uniform distribution, eliminating the risk of color clumping or uneven patches.
Proper Mixing
Proper mixing is essential for achieving the desired effect. A slow, steady pace and thorough mixing ensure that the pigments are evenly distributed and that the final product has a smooth, marbled effect. Do not overwork the resin, as this can introduce air bubbles and adversely affect the finish.
Curing Time
Allowing the resin to cure properly is vital for a durable, long-lasting finish. Always follow the manufacturer's instructions for curing times and ensure that the resin is fully cured before handling or using the final product.
Conclusion
Mixing pigment into clear resin using a drill to create a smooth, swirled effect is a rewarding process that can yield stunning results. By choosing the right pigments, mixing them thoroughly, and using the swirling technique, you can create visually striking, marbled resin pieces. Experimenting with different techniques and pigments allows you to achieve unique effects and enhance your resin crafting skills. With practice and patience, you can master the art of resin pigment mixing and create beautiful, long-lasting resin pieces.
Watch the Reel
Questions readers ask
What types of pigments can I use to achieve a marbled effect in resin?
You can use a variety of pigments to create marbled effects in resin. These include acrylic paints, alcohol inks, and resin-specific pigments. Each type offers different levels of vibrancy and transparency, so choose based on the desired outcome for your project.
How do I prevent pigments from clumping when mixed with resin?
To prevent clumping, ensure that your pigments are finely ground and well-dispersed before adding them to the resin. Mix the pigments thoroughly with a small amount of resin first to create a paste, then gradually add more resin until you reach the desired consistency.
Can I mix multiple colors to create new shades in my resin project?
Absolutely. Mixing multiple colors is a great way to create unique shades and gradients. Start by mixing your base colors with resin, then combine them in a separate container to achieve the desired shade. This allows for better control and more predictable results.
What techniques can I use to create swirling effects in resin?
To create swirling effects, pour your colored resins into the mold in layers, then use a toothpick, skewer, or a specialized resin tool to gently swirl the colors. Be careful not to overmix, as this can cause the colors to blend too much and lose their distinctiveness.
How do I achieve a pearlescent finish in my resin projects?
To achieve a pearlescent finish, use pigments specifically designed for this effect, such as iridescent or pearlescent micas. Add these pigments to your resin and mix well, ensuring that the mixture is free of lumps. The result will be a beautiful, shimmering finish that adds depth and elegance to your resin art.
What should I do if my resin mixture becomes too thick after adding pigments?
If your resin mixture becomes too thick, you can add a small amount of resin thinner or a compatible solvent to adjust the consistency. Be cautious when adding thinners, as too much can affect the curing process. It's also helpful to work in small batches to maintain better control over the viscosity.
How can I ensure that my marbled resin effects are consistent across multiple projects?
To ensure consistency, document your mixing ratios and techniques for each color combination. Take notes on the amount of pigment used, the mixing process, and any special tools or methods. This will help you replicate the desired effects in future projects and maintain a uniform look across your resin art pieces.
Recent articles
Fresh deep dives from the latest Reels we unpacked.




Comments
Be the first to comment.