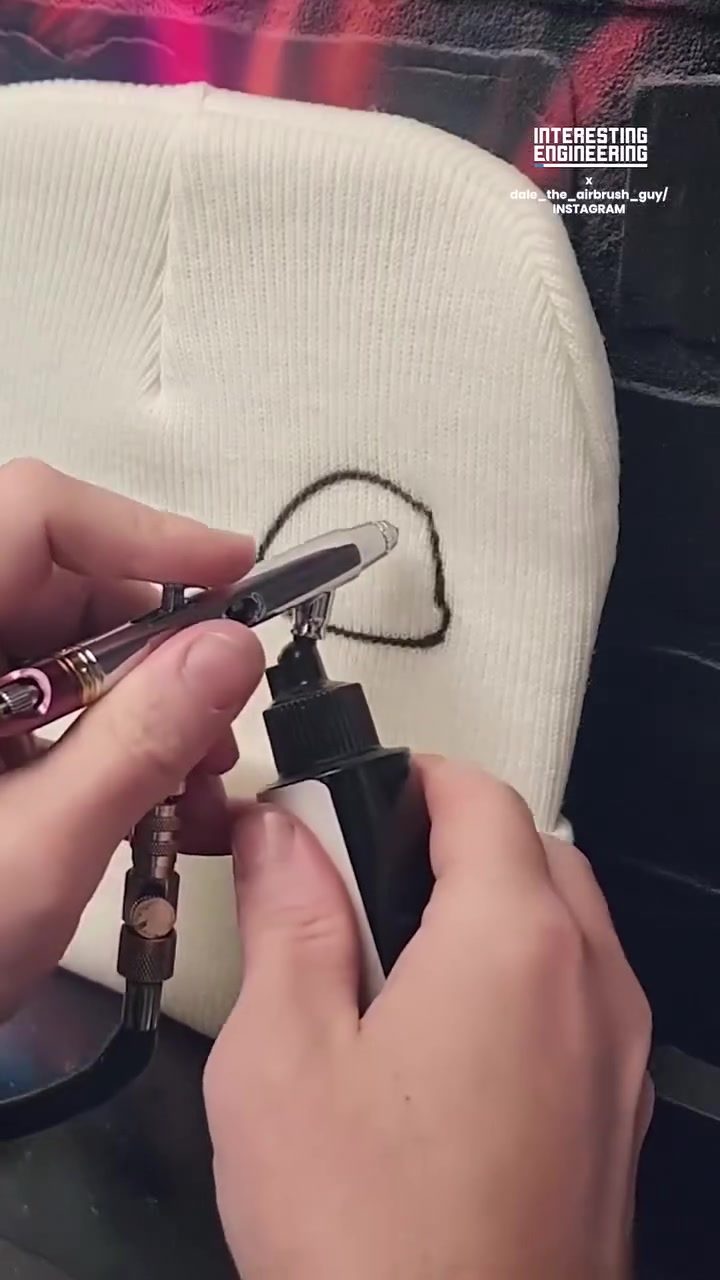
Airbrushing a beanie is a creative way to add personal touches to your headwear. This customization process involves several steps, from sketching the initial outline to adding intricate details and finishing with decorative lettering.
Why Airbrushing a Beanie Matters
Airbrushing is a versatile technique that allows for precise and detailed artwork on various surfaces, including fabric. When applied to a beanie, it can transform a simple accessory into a unique statement piece. This technique is particularly popular among craft enthusiasts and artists who enjoy experimenting with different textures and colors. Airbrushing a beanie not only adds a personal touch but also makes it stand out from mass-produced items.
The Airbrushing Process
The process of airbrushing a beanie involves several key steps, each contributing to the final design. Let's break down the process into its core components:
Sketching the Outline
The first step in airbrushing a beanie is to sketch a simple outline using black airbrush paint. This outline serves as the foundation for the design. For instance, if you're creating a turtle design, you would start by outlining the turtle's shape. This step is crucial as it sets the framework for the rest of the design.
Adding Details
Once the outline is complete, the next step is to add details. This could include eyes, legs, and any other features that define the design. In the case of a turtle, details like the eyes, shell, and legs are added to give the turtle its distinctive shape. These details are often created using different shades of paint to add depth and dimension.
Creating Shading and Depth
After the outline and details are in place, the next step is to create shading and depth. This is achieved by layering colored paint to add dimensionality to the design. By applying multiple layers of paint, the design becomes more three-dimensional and visually appealing. Shadows and highlights enhance the overall look, making the design pop.
Adding Decorative Lettering
The final step in the airbrushing process is adding decorative lettering. This step completes the custom design and can include words, phrases, or initials. For example, the words 'Little Nation' can be airbrushed onto the brim of the beanie, adding a personal touch and making it truly one-of-a-kind.
Practical Tips for Airbrushing
Airbrushing a beanie requires some practice and the right tools. Here are some practical tips to help you get started:
Choose the Right Paint
Selecting the right paint is crucial for a successful airbrush project. Use airbrush-specific paints that are designed for fabric. These paints are usually water-based and can be easily cleaned from the airbrush. Additionally, choose colors that complement each other and enhance the design.
Prepare the Surface
Before you start airbrushing, prepare the surface of the beanie. Clean it thoroughly to remove any dirt or residue. You may also want to apply a base coat of paint to create a smooth surface for your design. This step ensures that the paint adheres well and the final design looks professional.
Practice Your Technique
Airbrushing requires a steady hand and precise control. Practice your technique on scrap fabric or paper before moving on to the beanie. This will help you get a feel for the airbrush and improve your skills.
Use Multiple Layers
To achieve depth and shading, use multiple layers of paint. Start with a light coat and gradually build up the color. This technique allows you to create a more detailed and visually appealing design.
Clean Your Airbrush
Regularly clean your airbrush to maintain its performance. Clogged nozzles can affect the flow of paint and result in uneven application. Use a cleaning solution recommended by the manufacturer to keep your airbrush in top condition.
Important Takeaways
Airbrushing a beanie is a rewarding craft that allows you to express your creativity. By following the steps outlined above, you can create stunning designs that stand out.
Personalize Your Accessories
Airbrushing is an excellent way to personalize accessories like beanies. Whether it's a favorite character, a meaningful phrase, or a unique pattern, airbrushing allows you to create something that reflects your personality.
Experiment with Designs
Don't be afraid to experiment with different designs and techniques. Airbrushing offers endless possibilities for creativity, so feel free to try new things and see what works best for you.
Conclusion
Airbrushing a beanie is a fun and creative way to customize your headwear. By following the outlined steps and practicing your technique, you can create stunning designs that are unique to you. Whether you're a beginner or an experienced airbrush artist, this technique offers a world of possibilities for personal expression and creativity.
Watch the Reel
Questions readers ask
What materials are needed for airbrush beanie customization?
To custom paint a beanie, you'll need an airbrush gun, air compressor, airbrush-specific paint, stencils or sketches, and a beanie. You can find these tools in craft stores or online retailers that specialize in art supplies. Additionally, you'll need a well-ventilated workspace and protective gear such as a mask and gloves.
Can I airbrush any type of beanie?
Most beanies can be airbrushed, but the best results come from cotton or cotton-blend beanies. These materials absorb paint well and provide a smooth surface for intricate designs. Avoid beanies with loose threads or uneven surfaces, as these can interfere with the airbrushing process.
How do I create a design for my airbrush beanie?
Start by sketching your design on paper to plan the layout and details. You can find inspiration in beanie design tutorials or create your own unique artwork. Once you're satisfied with your sketch, transfer the outline onto the beanie using a fabric pencil or chalk, and then begin airbrushing the design.
What types of paints should I use for airbrush beanie customization?
Use paints specifically formulated for airbrushing, such as acrylic or textile paints. These paints are designed to flow smoothly through the airbrush and adhere well to fabric. Make sure to choose paints that are suitable for the material of your beanie and follow the manufacturer's instructions for proper usage and care.
How can I add shading and depth to my airbrush beanie design?
To create depth and shading in your airbrush beanie design, gradually build up layers of color, using lighter and darker shades of the same color. You can also use different airbrush techniques, such as cross-hatching or stippling, to add texture and dimension to your artwork.
Can I add lettering to my custom airbrushed beanie?
Yes, adding personalized lettering to your airbrushed beanie can be a great way to make it stand out. Before applying your design, practice your lettering on paper to ensure it looks just right. You can use stencils or freehand techniques to create the lettering directly onto the beanie.
How do I seal and care for my custom airbrushed beanie?
To preserve your custom airbrushed beanie, apply a fabric sealant once the paint is completely dry. This will help protect the design from fading or washing off. To care for your beanie, hand wash it gently using cold water and mild detergent, then allow it to air dry to maintain the longevity of the design.
Recent articles
Fresh deep dives from the latest Reels we unpacked.




Comments
Be the first to comment.